

Quick start
This tutorial is designed to get you started with developing a Mini Program quickly.
You can see the whole lifecycle of developing a mini program in the following figure:
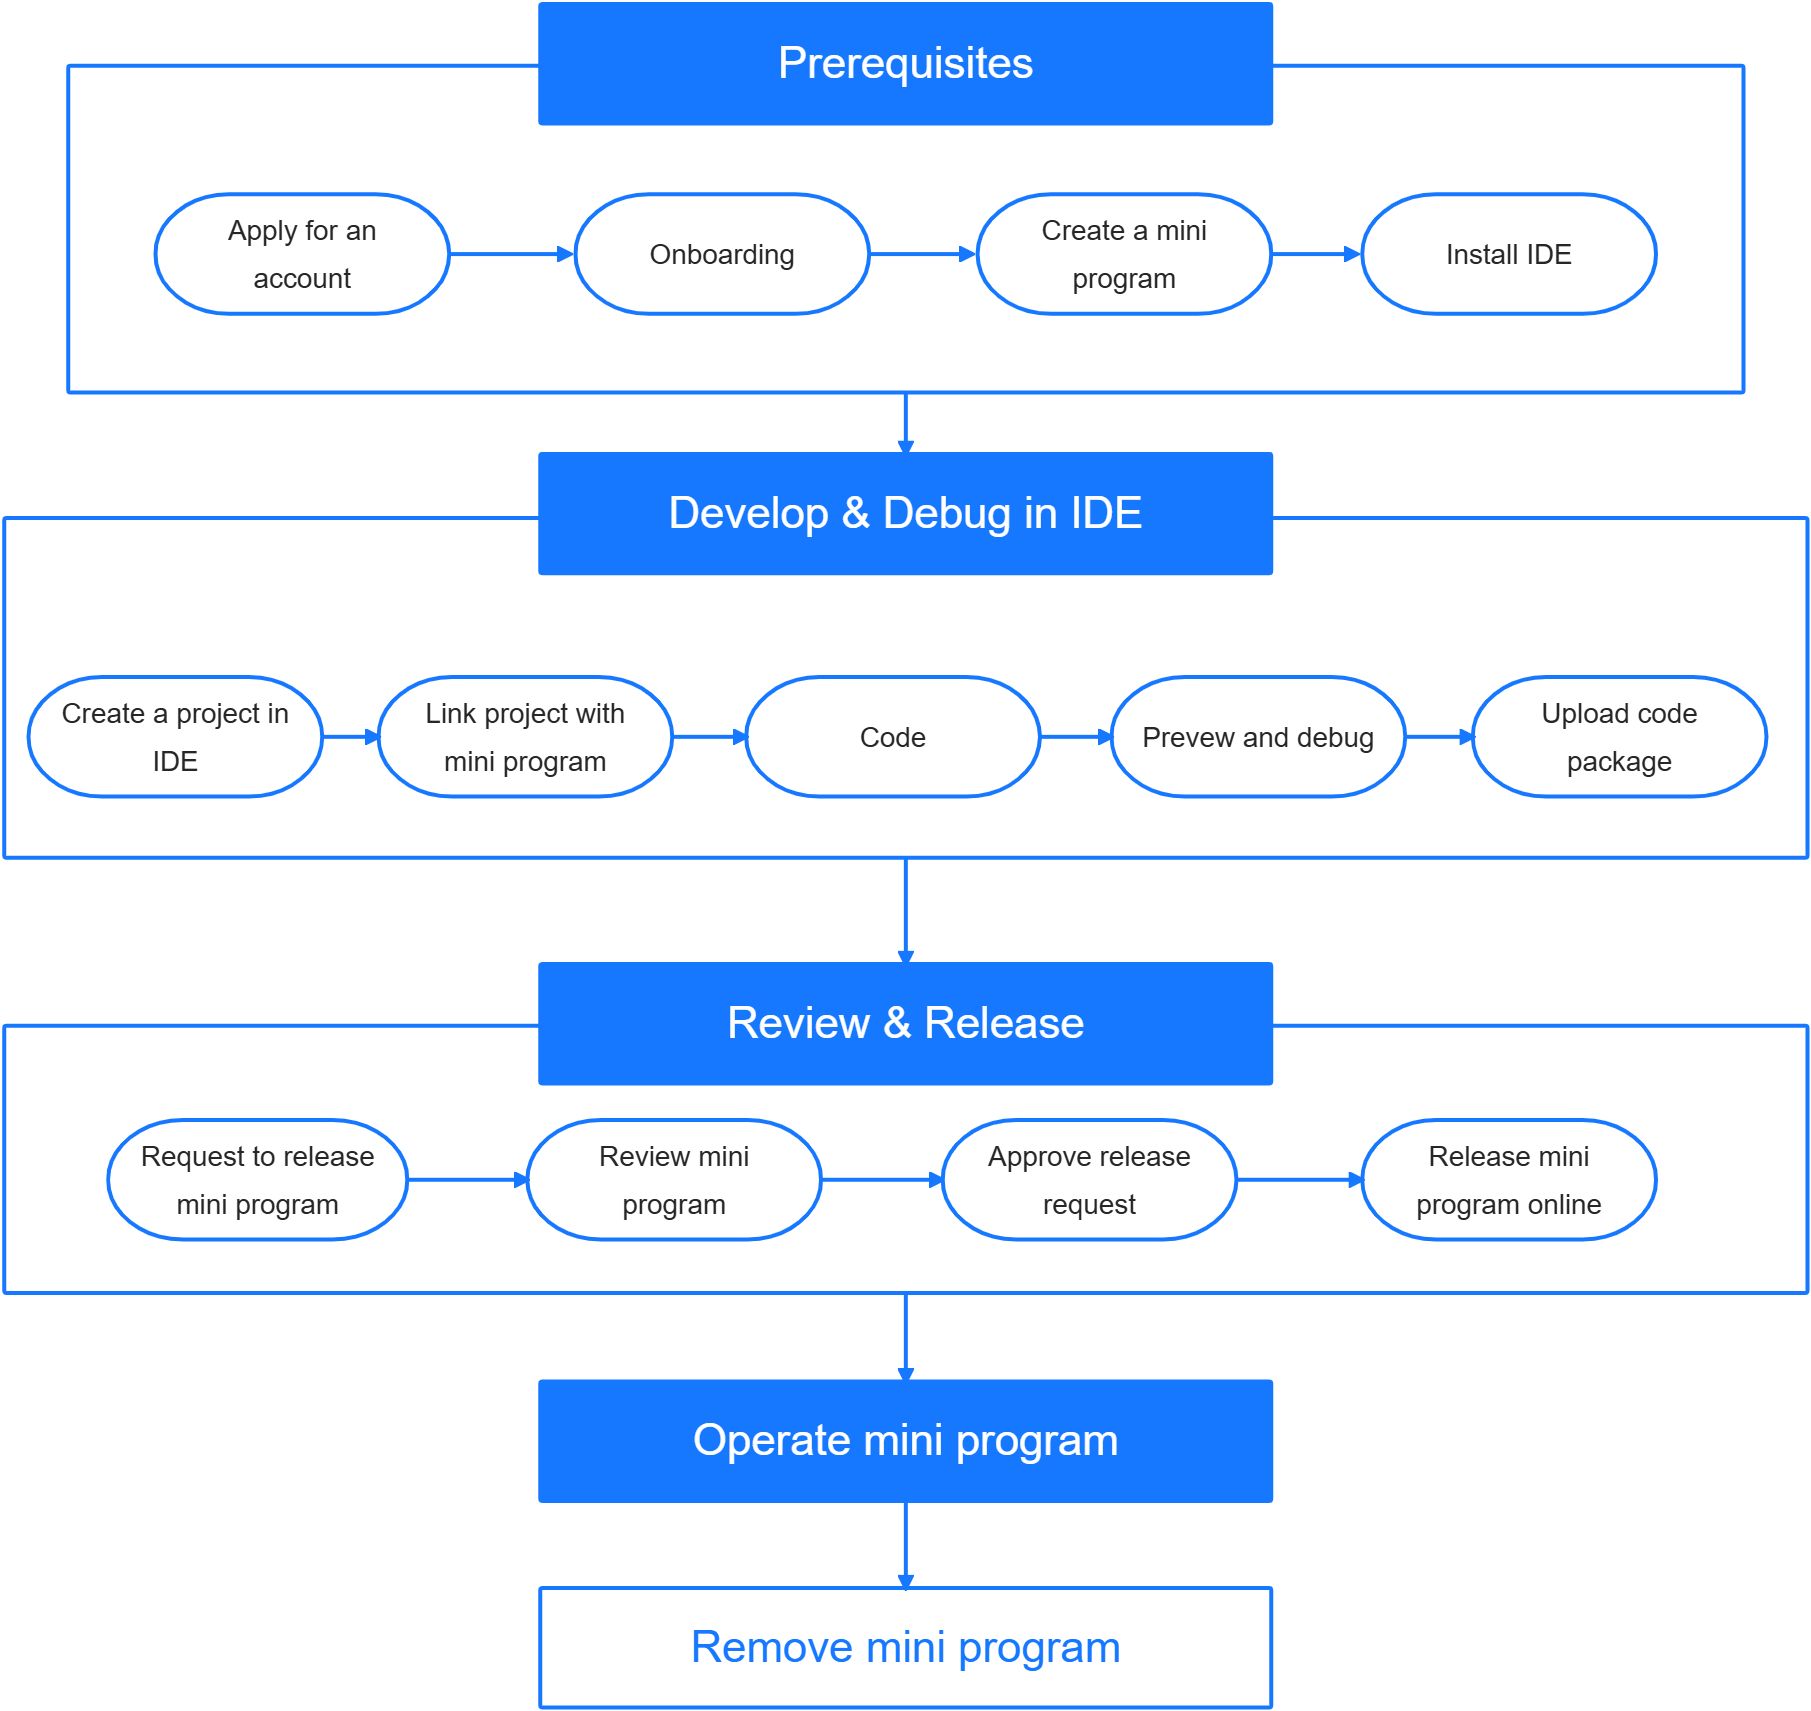
Figure 1. Mini program lifecycle
Mini program development overview
The lifecycle of a mini program covers from creating a developer account to releasing the mini program.
Prerequisite
Before you start, make sure you have completed the following settings:
- Apply for an account to join Mini Program Platform.
As a developer, you can join the platform to be a Mini Program admin or a Mini Program developer after you receive an email invitation.
- Complete the onboarding process.
- Create a mini program.
- If you are a Mini Program admin, you can apply to create a Mini Program on Mini Program Platform and submit the Mini Program particulars, including but not limited to: name, description, logo image, etc. After the creation is successful, a unique identifier will be assigned to the newly created Mini Program.
- If you are a Mini Program developer, the Mini Program admin can add you as a member of a Mini Program.
- Download Mini Program Studio.
Develop & Debug in IDE
- Create a project in Mini Program Studio.
- Link the project with the mini program that is created in Mini Program Platform.
- Code and debug.
- Upload the code package from Mini Program Studio to Mini Program Platform.
Review & Release
- Review the mini program and request to release the mini program.
- Workspace admin reviews and approves the release request.
- Release the mini program.
Users can now open the mini program in the app.
Also, marketing capabilities can be enabled to the mini program for operational scenarios. And the lifecycle of a mini program ends when a mini program is removed from the Mini Program Platform.
Next steps
Developers can learn more about Mini Program in the Quick Start documentation:
- Run the first Mini Program quickly by using the demo available in the Mini Program studio.
- According to the project structure knowledge, learn more about the demo Mini Program.