
Supply management
ASAP presents a wide range of content supplies by category, such as services, stores, movies, and tickets. You can manage these content supplies on the Supply Management page, where you can create, edit, activate, or deactivate services, view content details, and manage tags. You can also add tags for content supplies in batches.
Before you begin
Ensure you have configured the approval process details for the Wallet Content Activation/Edit/Deactivation process, including the approvers and required steps, on the Admin > Approval Management > Approval Processes page. This configuration is required for creating, editing, activating, and deactivating a service.
Manage services
To manage services, log in to the ASAP console and go to Growth > Content Asset Management > Supply Management.
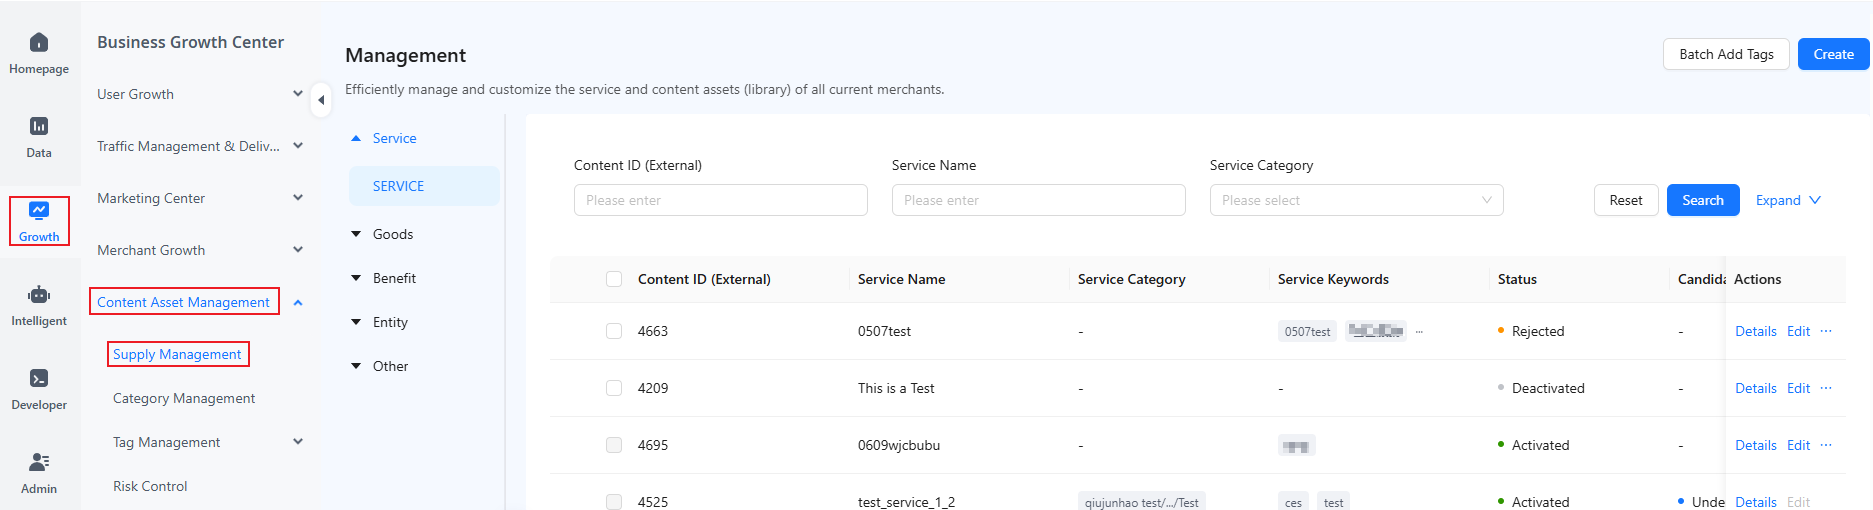
Create a service
To create a service, take the following steps:
- On the Service page displayed by default, click Create on the right side of the screen.
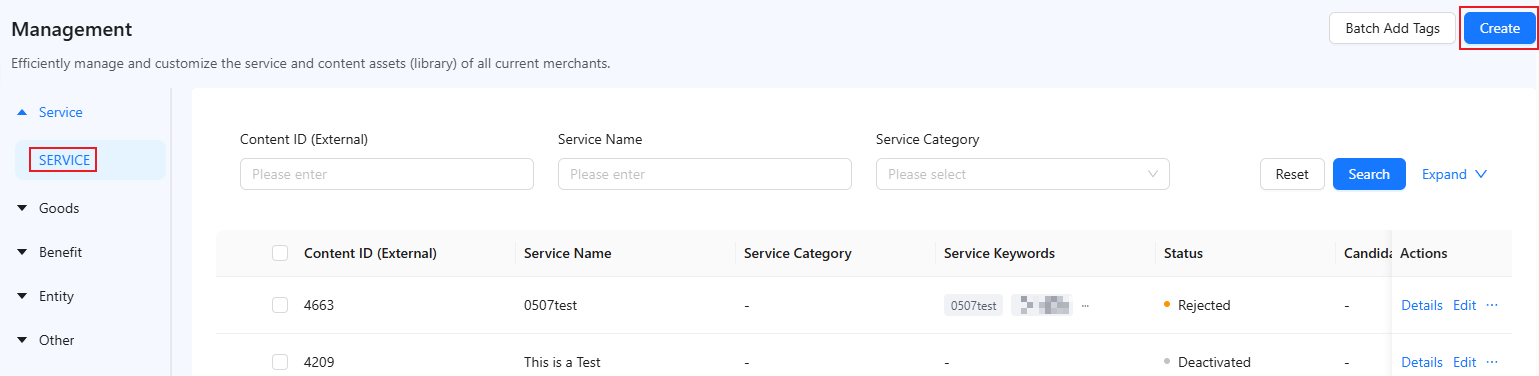
- Complete the required information on the Create Service page.
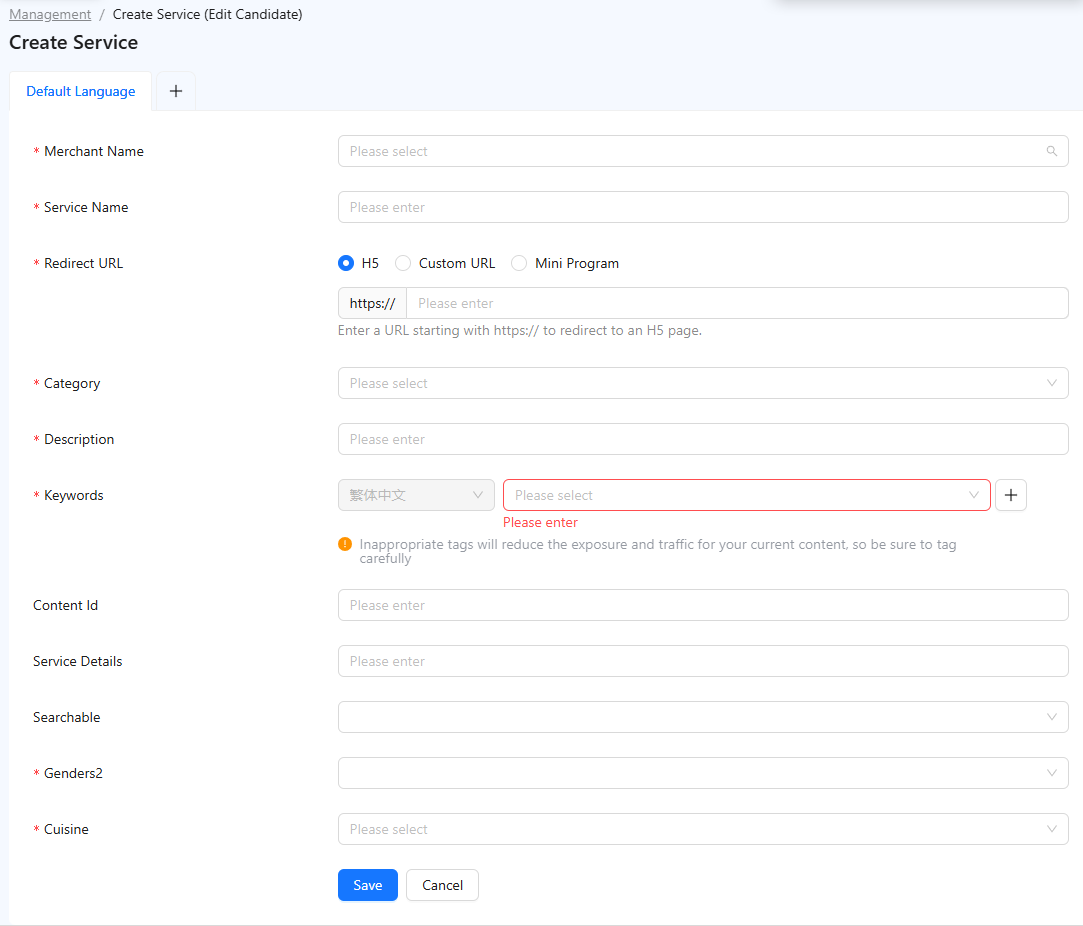
For detailed explanation of each field, see the following table:
Field name | Description |
Merchant Name | Enter a full merchant name or search and select a merchant from the drop-down list. |
Service Name | Enter a custom service name based on your business scenario. |
Redirect URL | Enter the address to which consumers will be directed when they interact with the merchant in the wallet app. Valid values:
|
Category | Select the most relevant category for content delivery. |
Description | Enter a description for the service. |
Keywords | Customize keywords or select AI-recommended keywords for the service. Ensure at least one keyword is configured in the default language. To add keywords in other languages, click |
Content ID | Enter the content ID. If the content is imported from a different platform, enter the content ID assigned by the platform. |
Service Details | Enter details about the service. |
Tag | Select tag values for the displayed custom tags. Appropriate tagging ensures precise content selection and delivery.
|


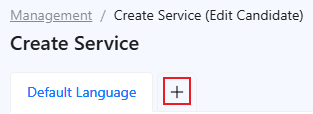
- Optional: Click the "+" icon at the top of the screen to add multi-language support. Then, configure the information as needed.
- Click Save. The system verifies whether your configurations are complete and valid. If they are, a confirmation dialog box will appear.
- In the dialog box, click Save and Submit for Activation.
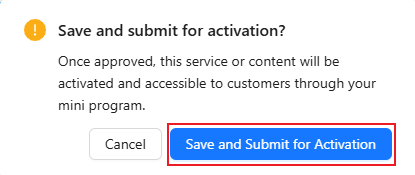
The service is then submitted for approval. Once approved, the service will be activated and delivered to customers through your wallet.
View service details
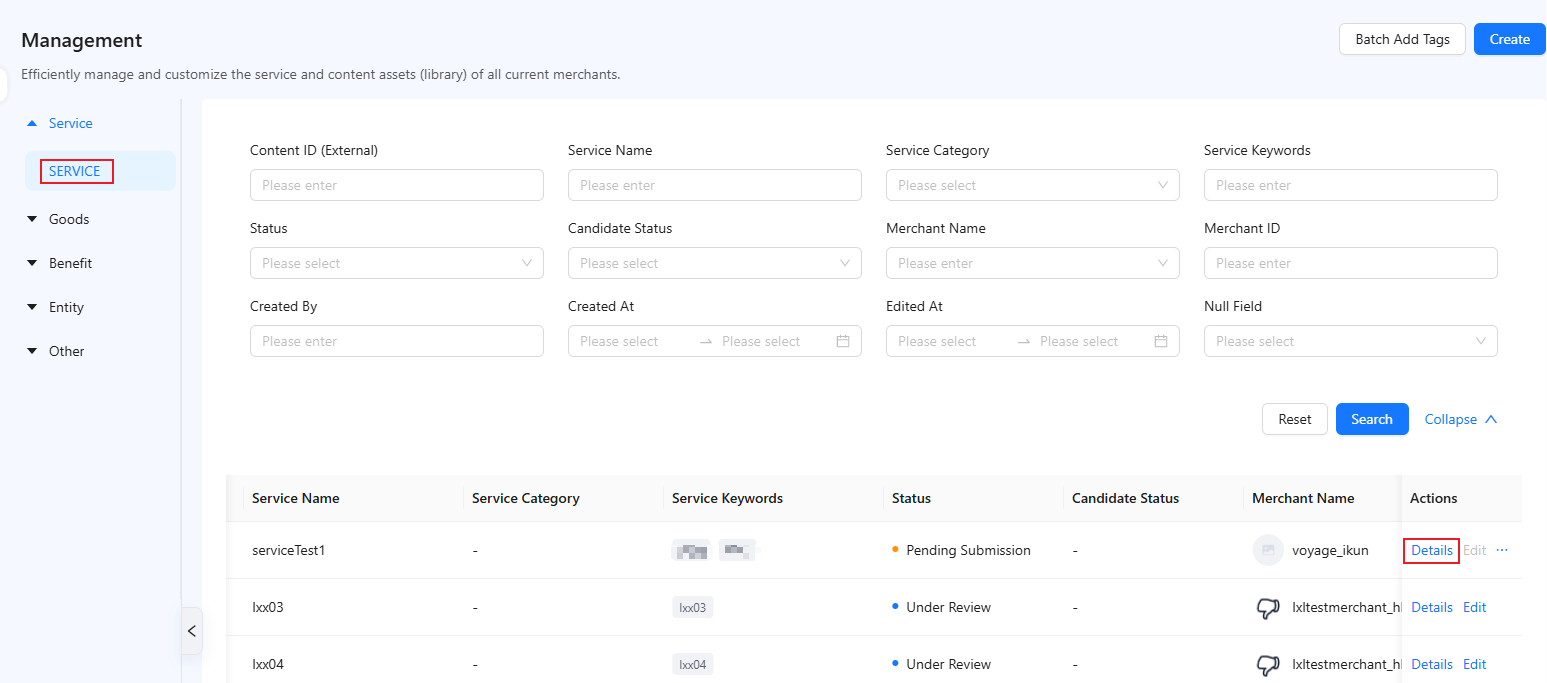
All created services are displayed on the Service page. You can filter services by service name, merchant name, candidate status, or service keywords. To view the details of a service, click Details in the Actions column.
Note:
- Candidate status indicates the status of the candidate version created when you edit an activated content item from the official version.
- You can select multiple values for Null Field to filter the content displayed. For example, if you select Service Keywords and Candidate Status, services whose keywords or candidate status are null will be displayed in the service list.
Edit a service
You can edit the basic information and custom tags of services if necessary. To edit a service, take the following steps:
- On the Service page, locate the service you wish to edit and click Edit in the Actions column to modify information configured for the service or custom tags.
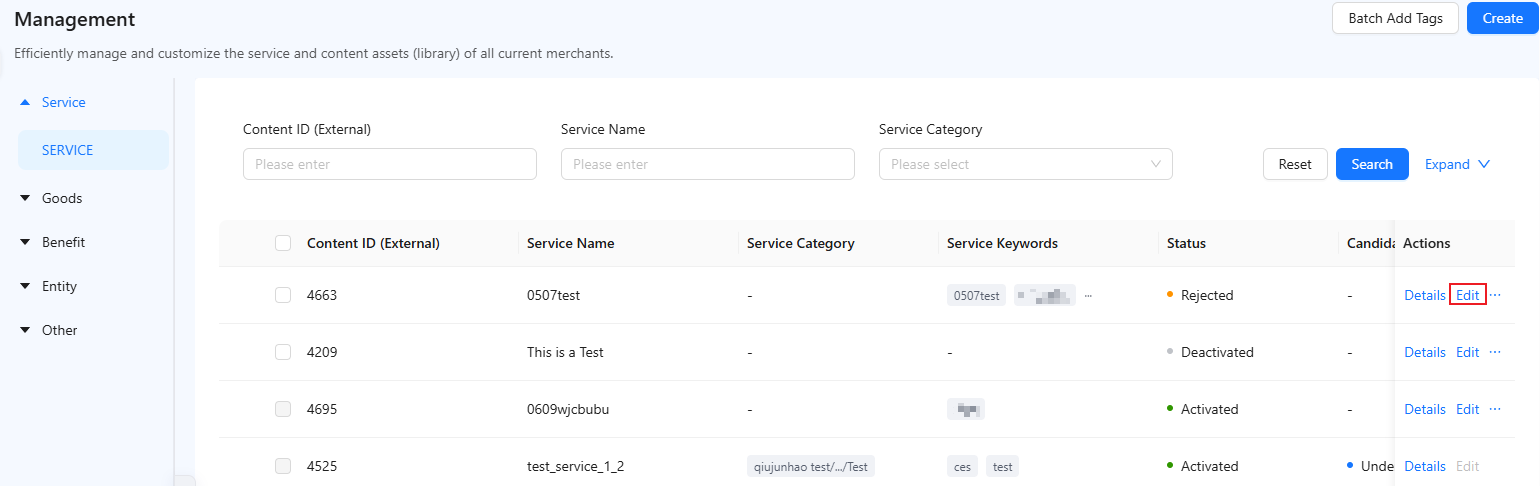
- On the page that appears, update the information as needed and click Save.
- In the displayed dialog box, click Save and Submit for Activation. Once approved, the service will be activated and can be selected for delivery.
Note: Services in Under Review status cannot be edited.
Activate a service
Only activated content can be used for selection and delivery. To activate a service, take the following steps:
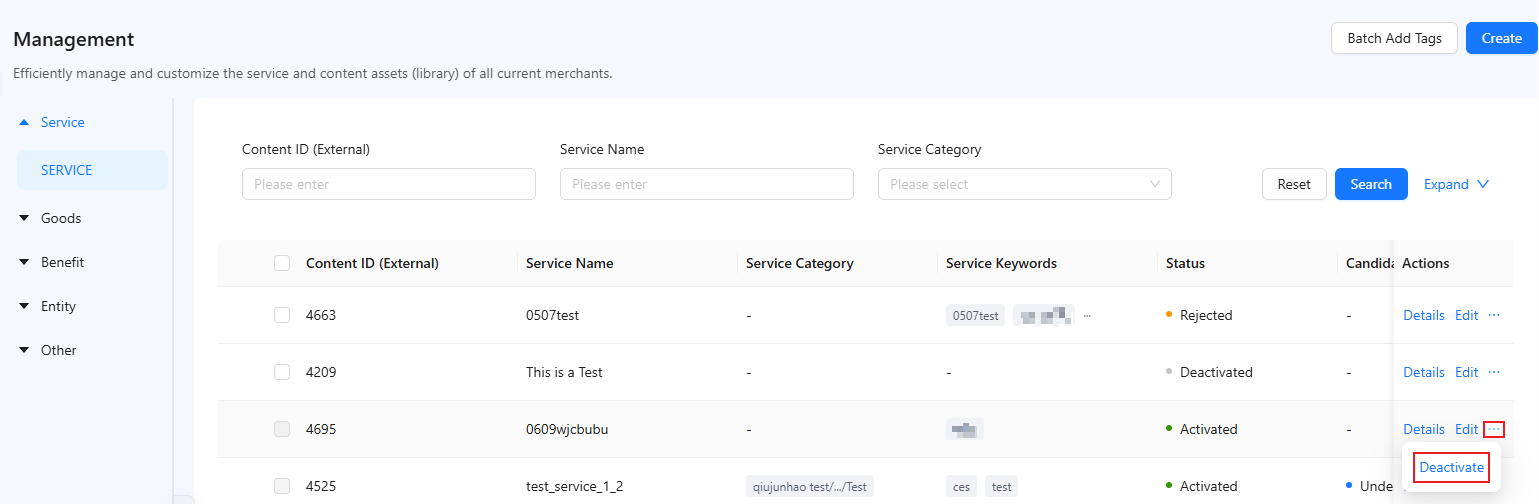
- On the Service page, locate the service and choose
 > Activate in the Actions column.

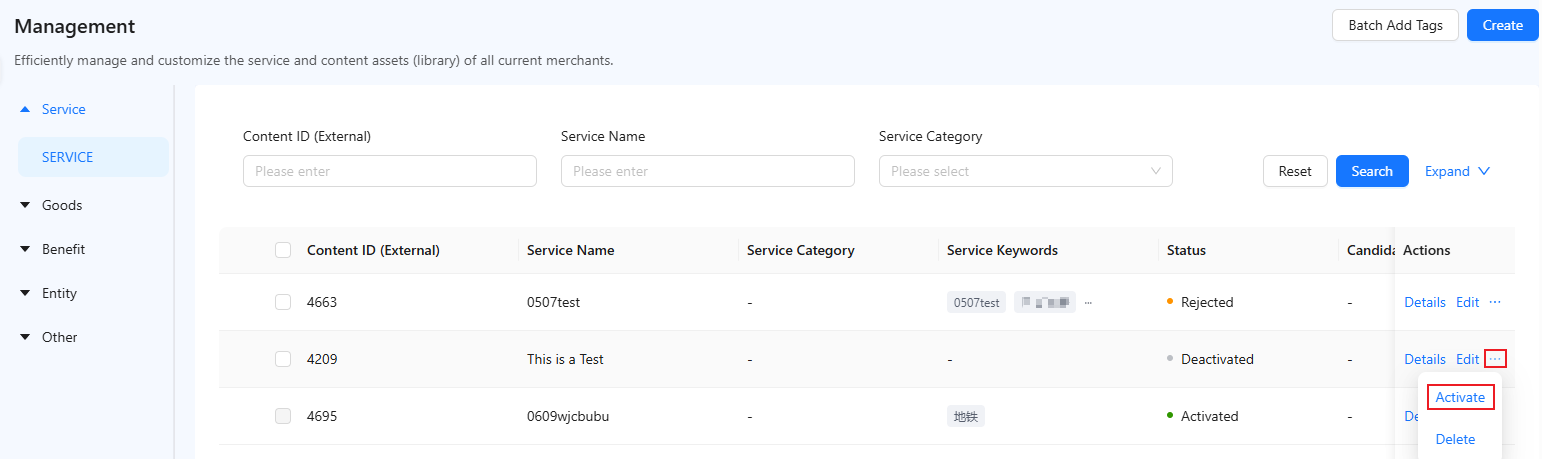
- In the confirmation dialog box, click Activate.
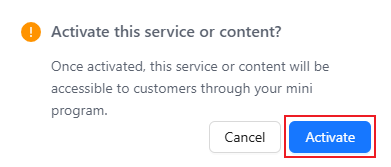
The service is then submitted for approval. Once approved, the service enters the risk control module for assessment. If no risk is detected, the service can be used for content selection and delivery. For more information, see Risk control.
Deactivate a service
To deactivate a service, take the following steps:
- On the Service page, locate the service and choose > Activate in the Actions column.
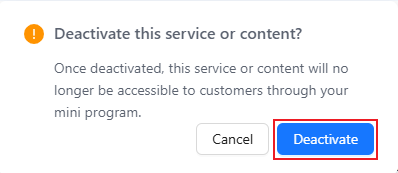
- In the confirmation dialog box, click Deactivate to submit a deactivation request. Once approved, the service will be deactivated and unavailable for content selection or delivery.
Manage other content types
For content types other than services, such as benefits and tickets imported via the API, you can only view their details and edit or add keywords and custom tags for them.
View content details
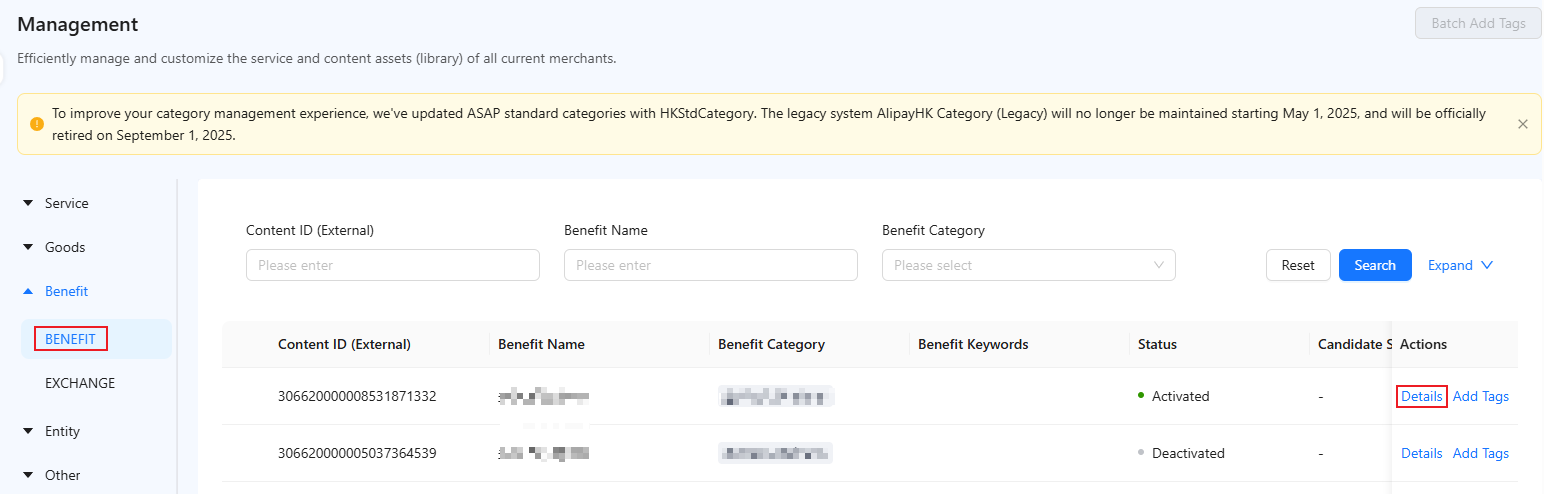
To view the details of content types excluding services, click the corresponding tab, such as Benefit, and click Details in the Actions column.
Add keywords or custom tags
To add or edit keywords and custom tags for content types excluding services, take the following steps:
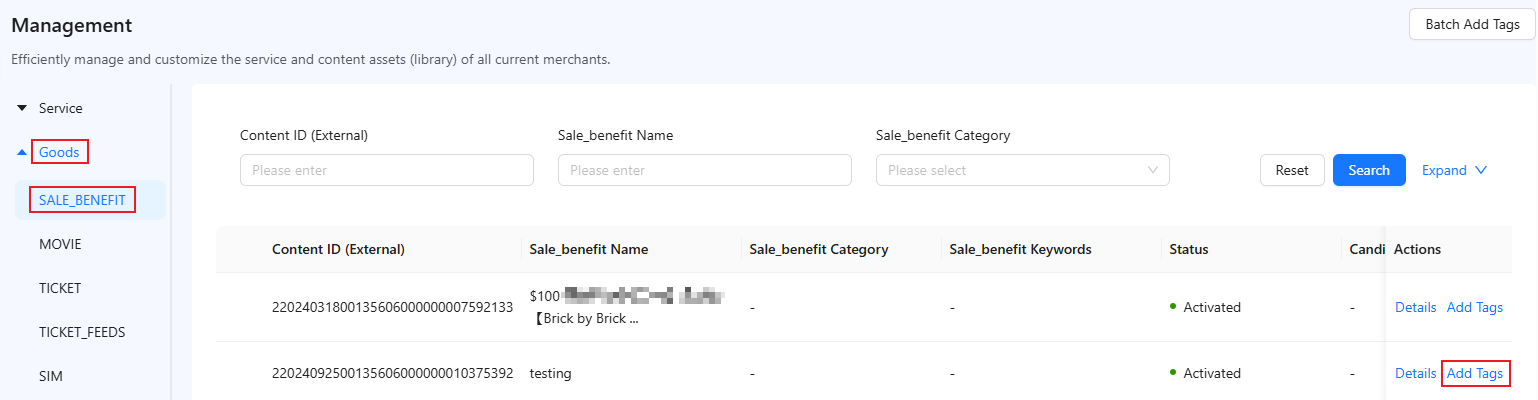
- On the Management page, click the corresponding tab, such as Sale_benefit under Goods.
- Locate the content item and click Add Tags in the Actions column.
- On the subsequent page, configure the keywords and custom tags as needed. You can customize keywords or select AI-recommended keywords for the content item.
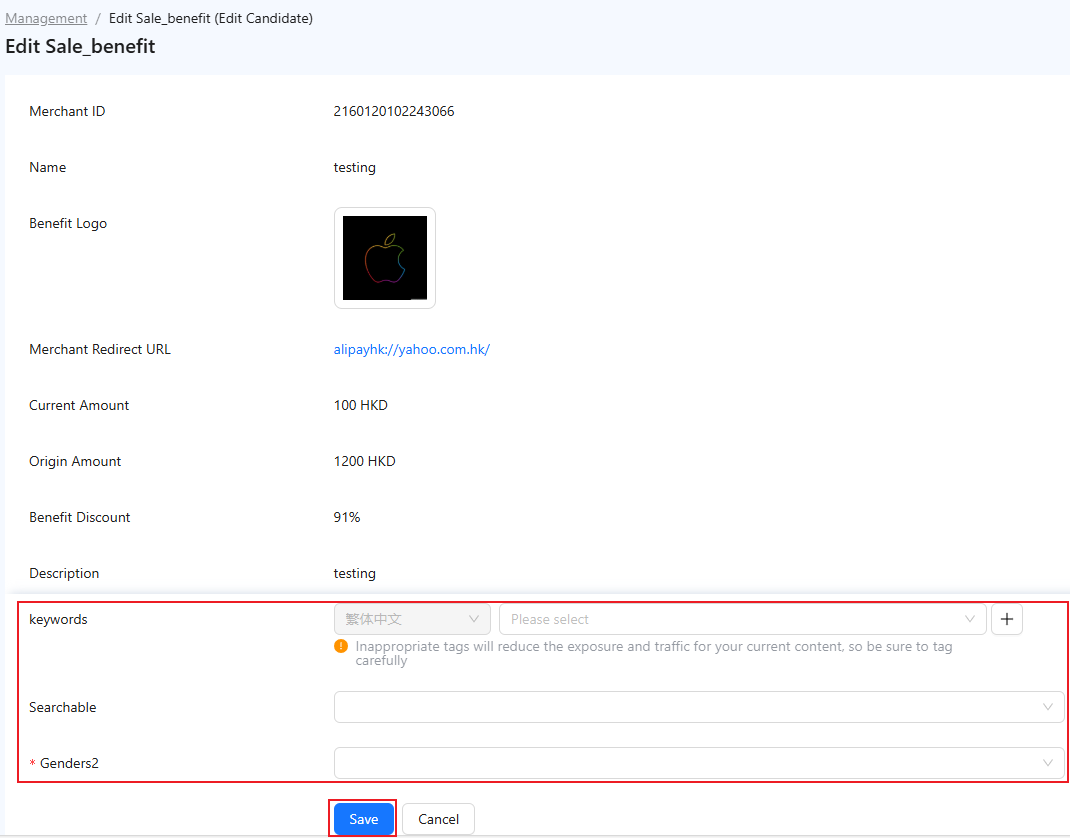
- Click Save.
Note:
- Once saved, any edits to keywords and custom tags for content types excluding services and campaigns (only available for AlipayHK) will apply immediately.
- If you add keywords and custom tags for campaigns (only available for AlipayHK), the changes will take effect only after the submitted request is approved. This requires that AlipayHK has configured the Keywords & Custom Tag Edit process on the Admin > Approval Management > Approval Processes page.
- You cannot add keywords and custom tags for content items in Under Review status.
Batch add tags
The Supply Management page also provides a functionality that allows you to add tags for your content assets in batches. For more information, see Batch add tags.