Create an ad task (Default)
With this topic, you can learn about basic concepts related to advertising and have an overview of the steps to deliver an ad task.
Overview
The default mode supports four different ad space types including Banner, Launchable, Badge, and Carousel.
To create an ad task under default space mode, check the following sections for detailed steps:
Procedures
Step 1: Select an ad space
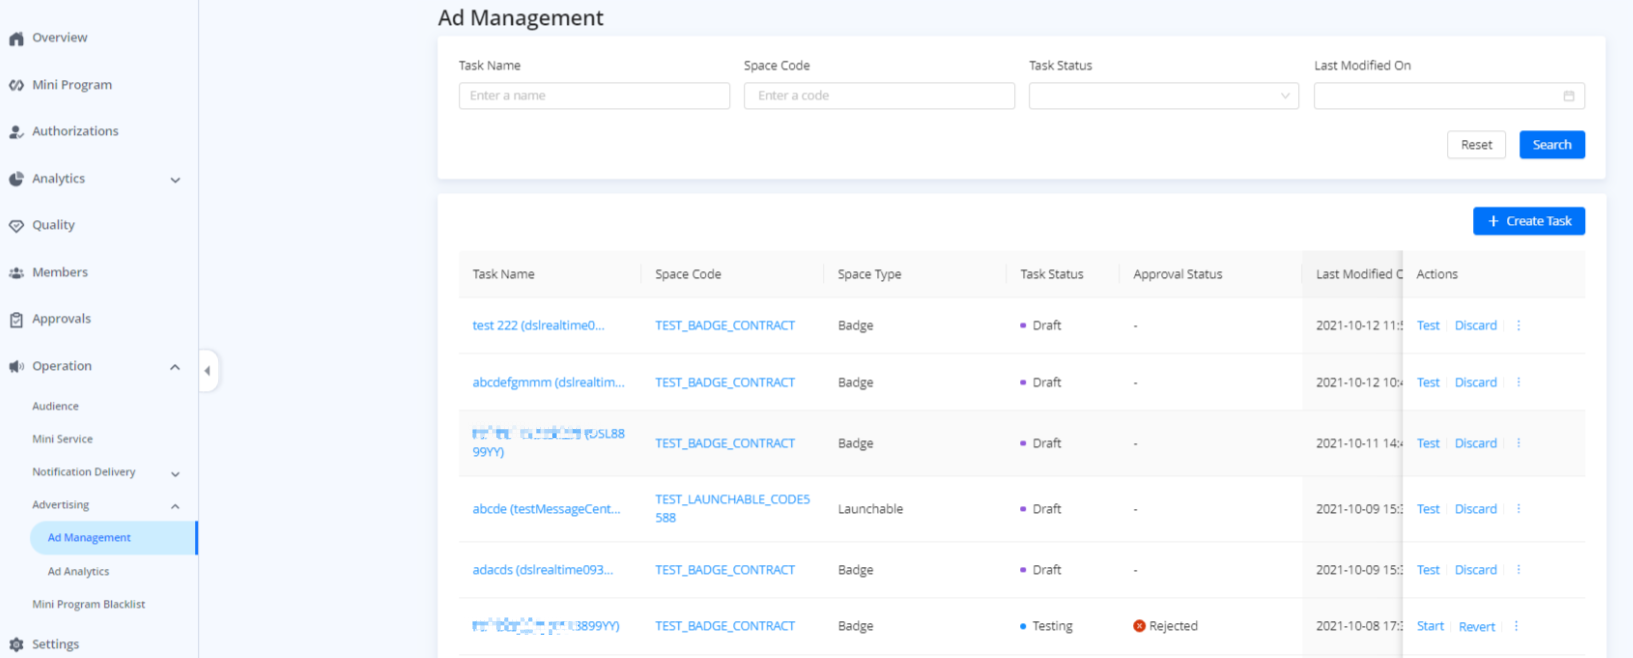
- Go to Operation in Mini Program Console > Ad Management.

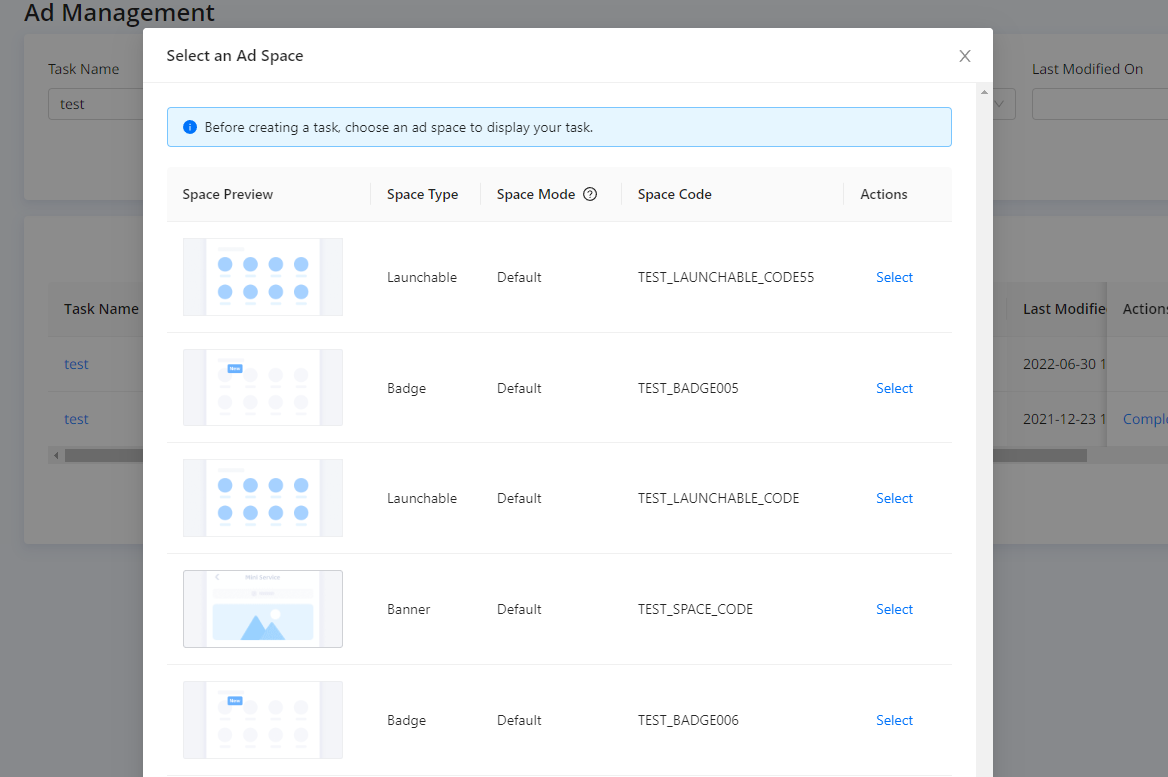
- Click + Create Task to select an ad space (Space Mode: Default).

Currently, the default space mode supports four types of ad space:
- Banner: A banner ad is fixed on the home page of Mini Service. Users can view and click a banner ad with no limit to the number of times.

- Launchable: A launchable ad is on the home page of Mini Service.

- Badge: A badge is on the home page of the super app.

- Carousel: A carousel is fixed on the home page of Mini Service to display multiple images. Users can scroll through each image by swiping on mobile devices.

Step 2. Create an ad task
After selecting an ad space, follow the steps below to create the task:
Enter basic information
Specify the following information for your task:
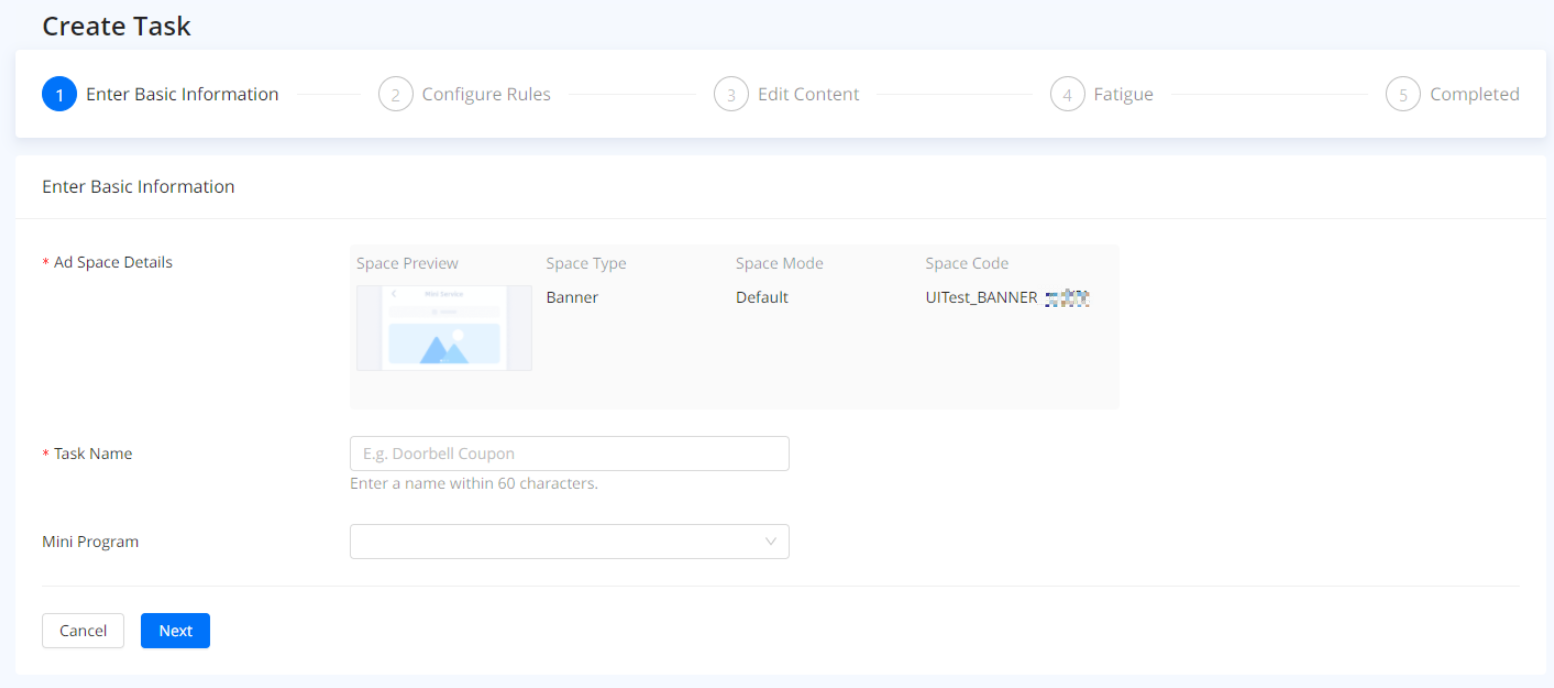
- Ad Space Details: Check the details of the ad space you selected. Make sure the details are consistent with the ad space you want.
- Task Name: Enter a name for the task. For example, if you want to execute a marketing activity for a smart doorbell in August, "Doorbell Promotion in August" will be a suitable name.
- Mini Program (Optional): Select a mini program that you want to perform marketing activities.
Confirm the above information and click Next.
Configure rules
- To set rules for a task, you need to fill in the following information:
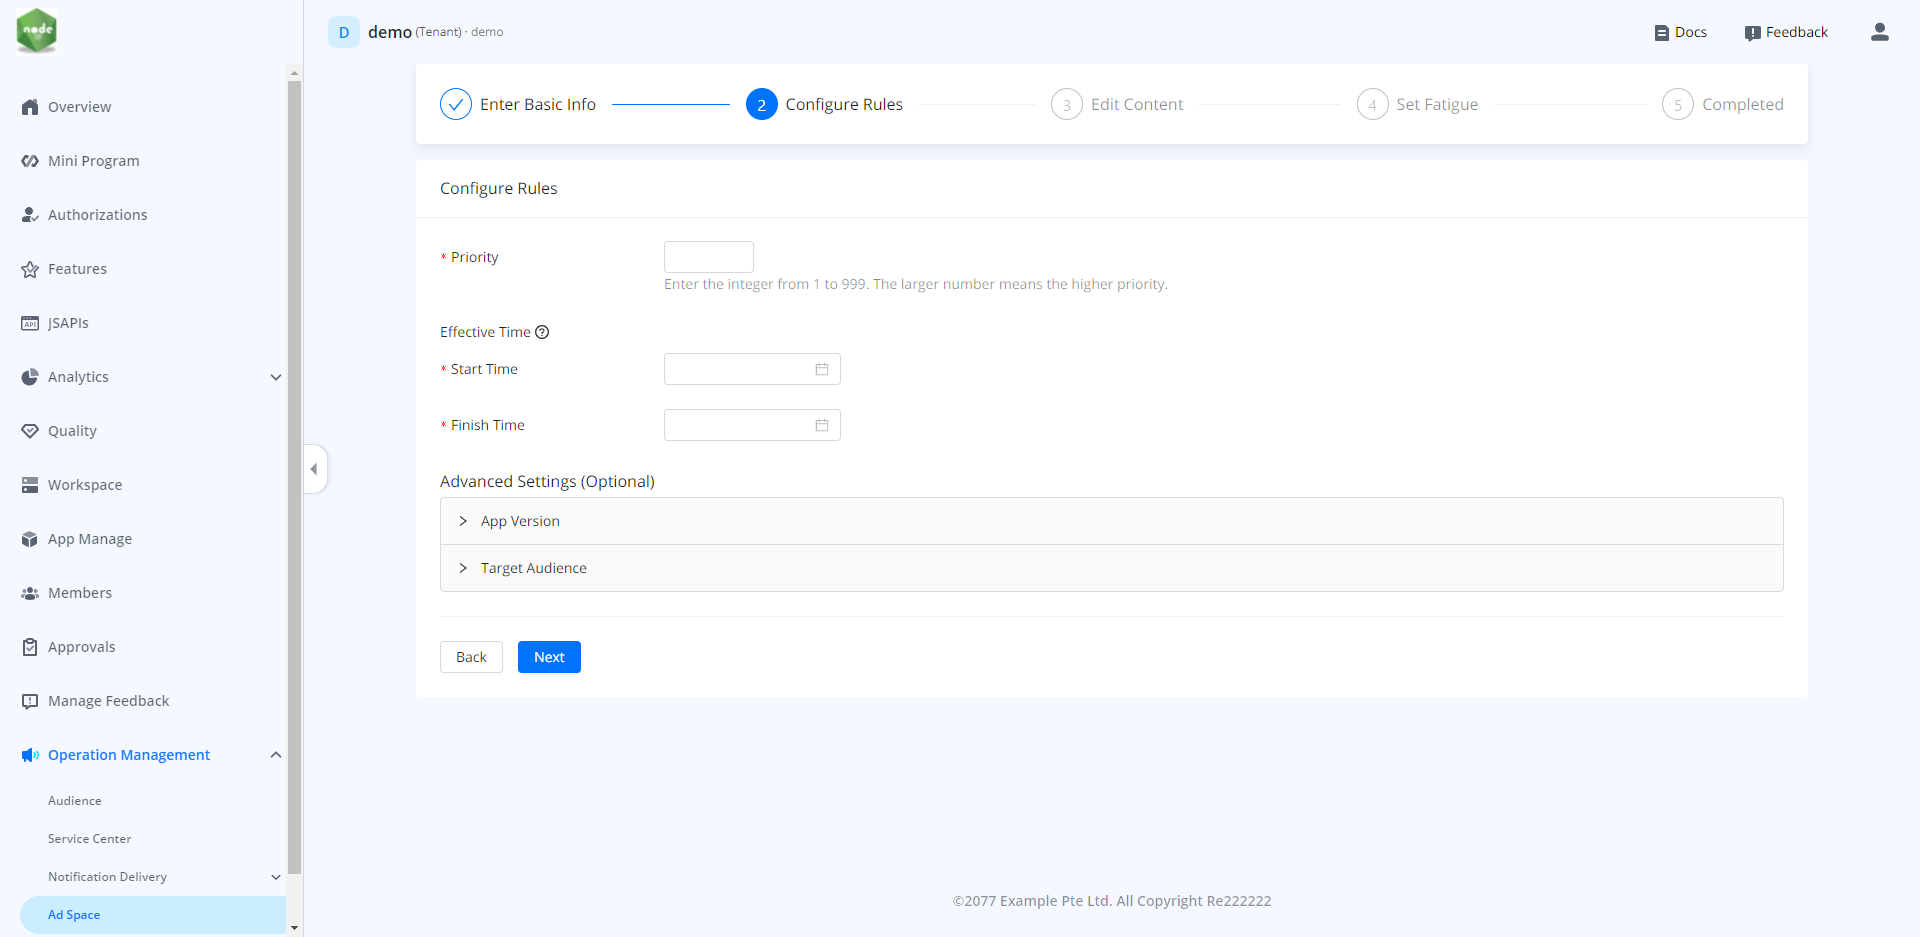
- Priority: Enter a number between 1 and 99 to set priority for a task. The larger number means the higher priority. For example, there are two tasks in the same ad space:
- Task 1: The priority is 10.
- Task 2: The priority is 8.
Task 1 will run earlier than task 2. If you set the same priority for multiple tasks in the same ad space, tasks will run in the order of approval time.
- Effective Time: Set the effective time for the task. Effective time is the time period to display tasks online. Once the effective time is expired, users cannot view and click the task. When multiple tasks share the same effective time, the task with the highest priority will display in an ad space.
- (Optional) In addition to basic rules, set app versions and target audiences to perform targeted advertising.

- App Version: Select a version range of the super app to reach more users and improve ad impressions. Or target the specific versions to perform accurate ad delivery.
- Target Audience: You can set target audiences to target specific users who you want to engage.
- If you select a mini program during entering basic information, there are two options to target users:
- All: Click All to display the task to all users of the super app.

- Selected: Click Selected and then click Select an Audience.

You can see all audiences that you have created under the selected mini program. Select an audience to deliver the task. 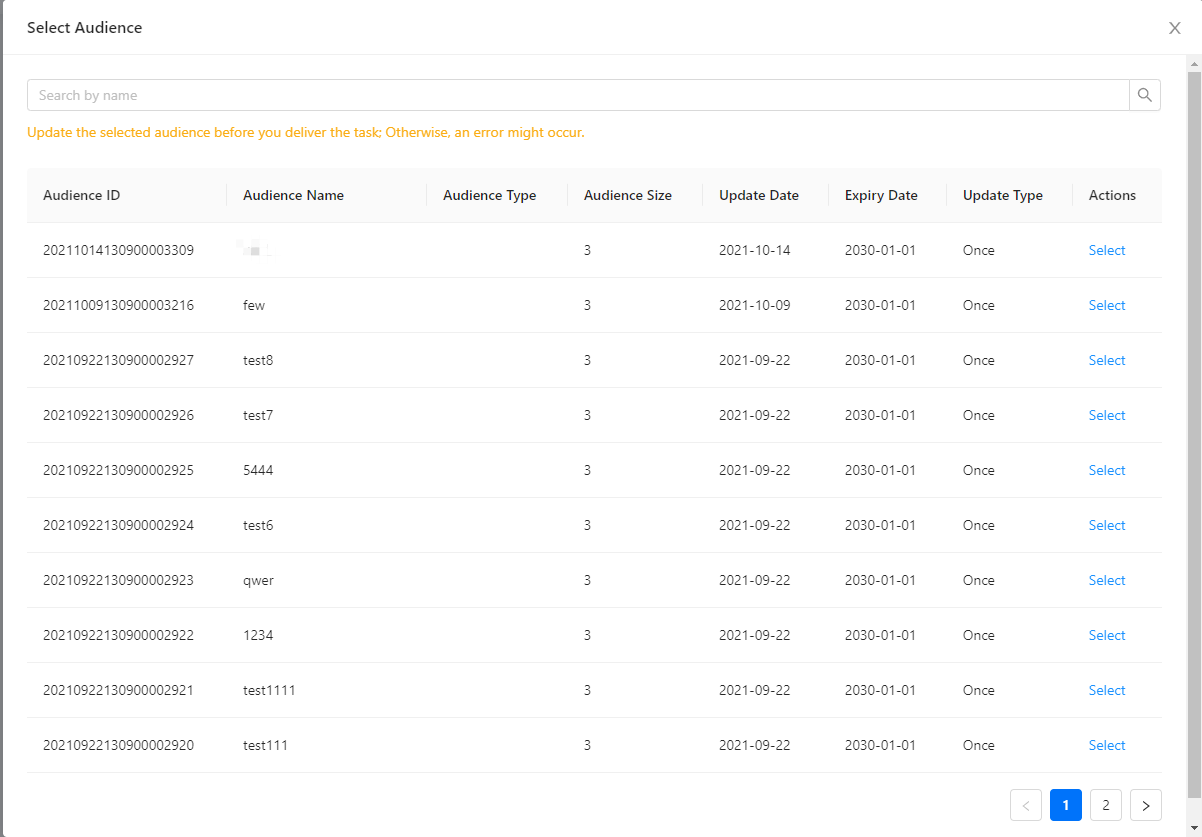
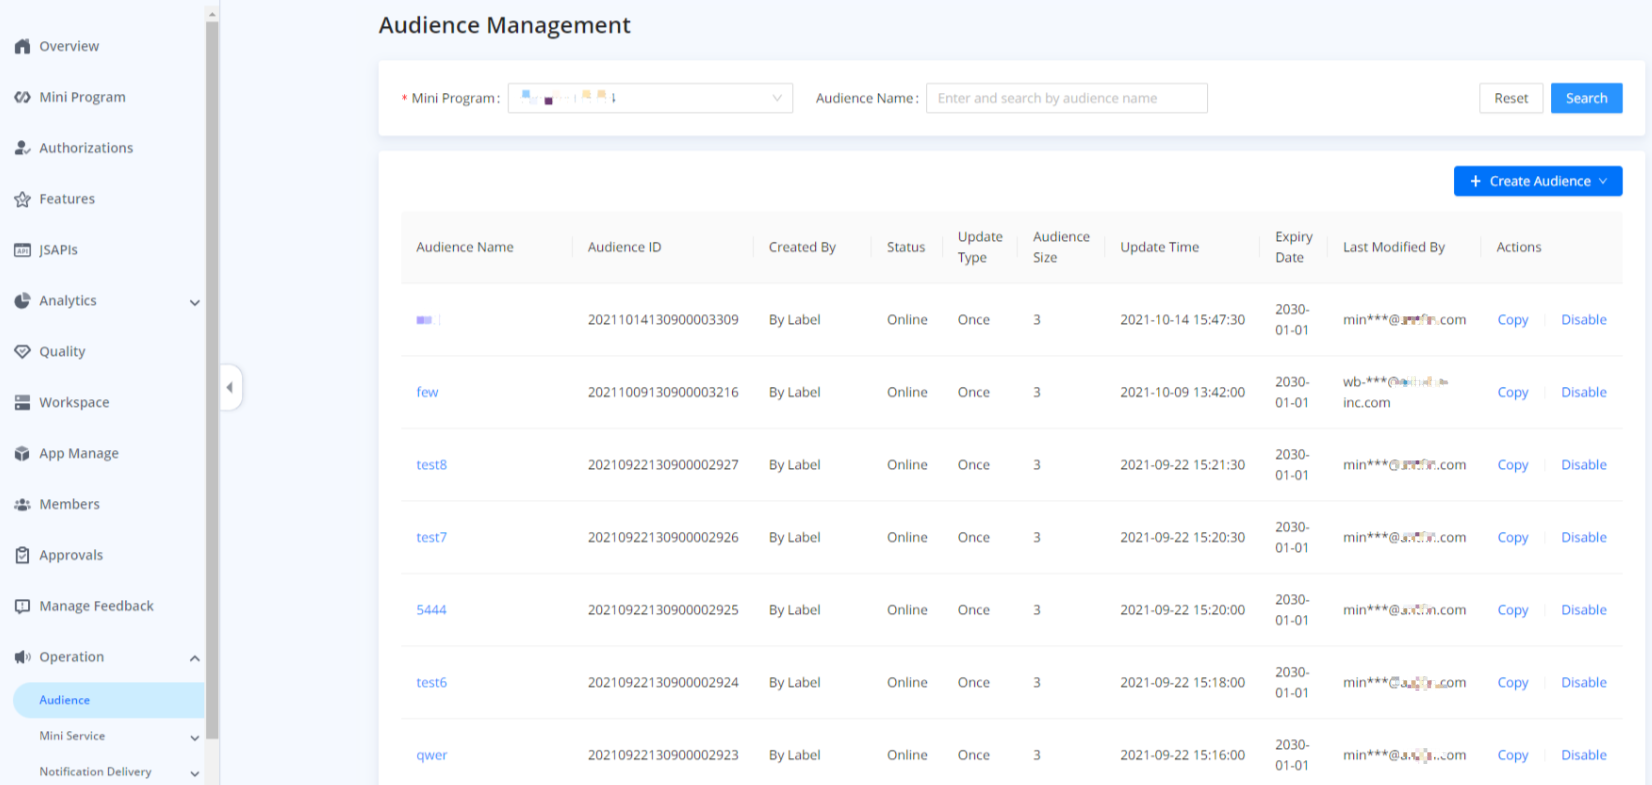
If there is no audience on the list, you can navigate to Audience on the left panel and click
+ Create Audience to create one under the selected mini program. For more information, see Create an audience.
- If you do not select a mini program during entering basic information, all users of the super app can view and click the task by default.

After you complete the above information, click Next and proceed to ad content settings.
Edit content
After setting impressions, you can edit content for the task based on the ad space you selected during entering basic information.
Banner
If you select the Banner when creating the task, you need to specify the following information:
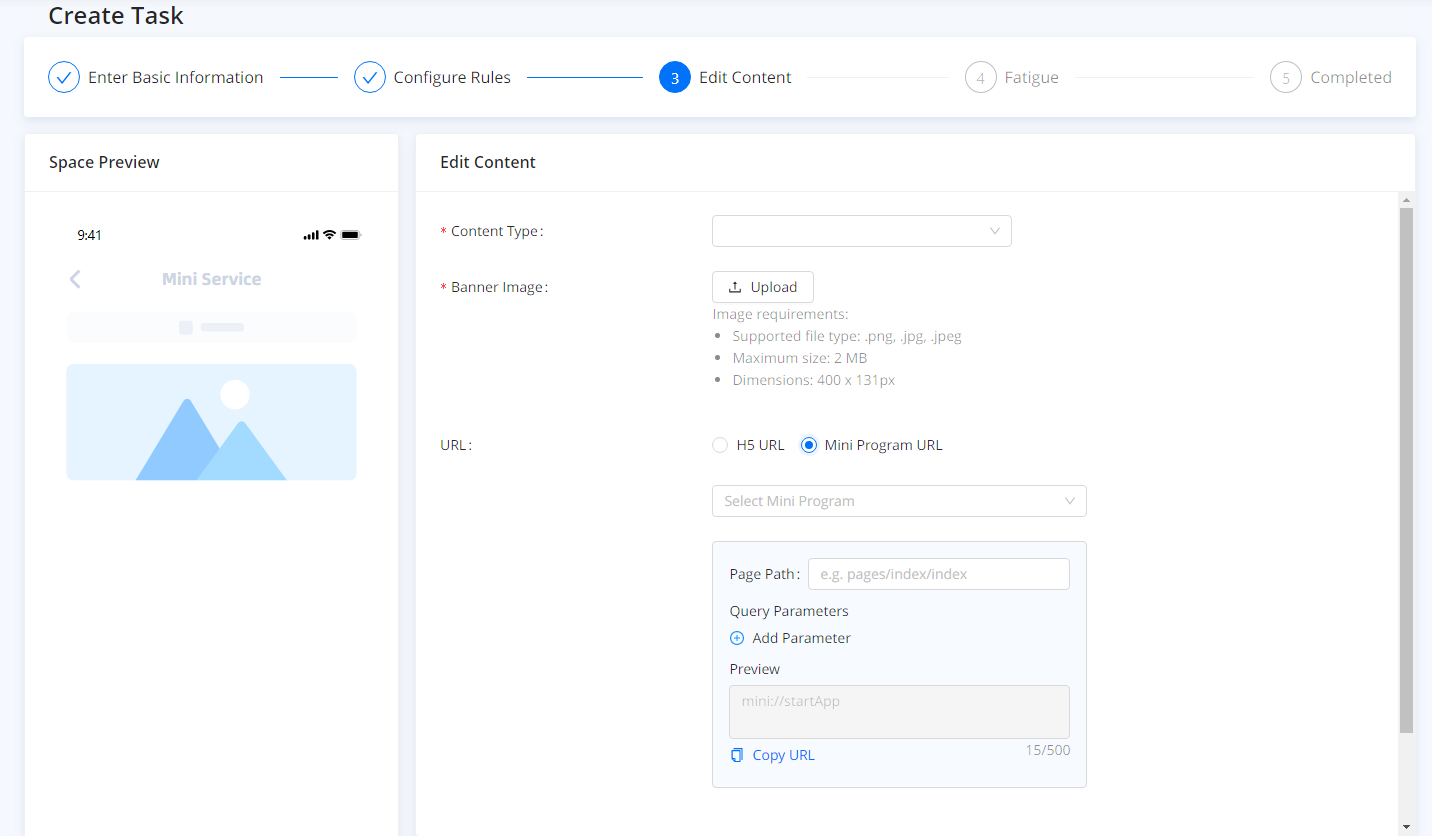
- Content Type: Select the content type for the task. Currently, you can only display images in the banner ad space.
- Banner Image: Upload an image as the ad content to show users what kind of products, services, or marketing activities you provide. You need to upload the image based on the following requirements:
- Supported file type: png, jpg, or jpeg
- Maximum size: 2MB
- Dimensions: 400 x 131 pixel
- URL: Select an URL for the content. You can redirect users to an HTML5 web page or the specific content in your mini programs.
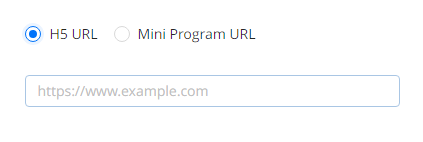
- If you want to redirect users to an HTML5 web page, click H5 URL and enter the URL in the input box below.
- If you want to redirect users to the specific content in your mini programs, click Mini Program URL. There are two different scenarios based on whether you selected a mini program during entering basic information:
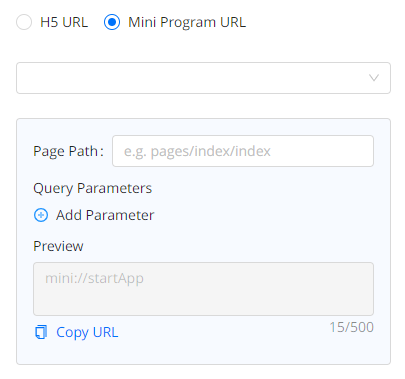
- If you did not select a mini program during entering basic information, you need to select a mini program that you want to redirect users to. Then add Page Path and Query Parameters to decide the specific content that you want to redirect users to. The whole URL can be previewed and copied on the preview area.
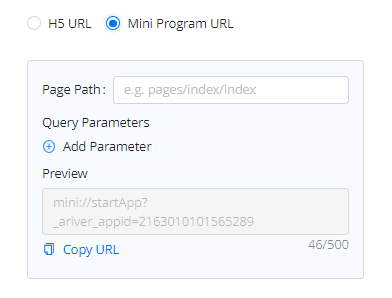
- If you already selected a mini program during entering basic information, you add Page Path and Query Parameters to redirect users to the specific content of this mini program. The whole URL can be previewed and copied on the preview area.
Launchable
If you select Launchable when creating the task, you need to specify the following information:
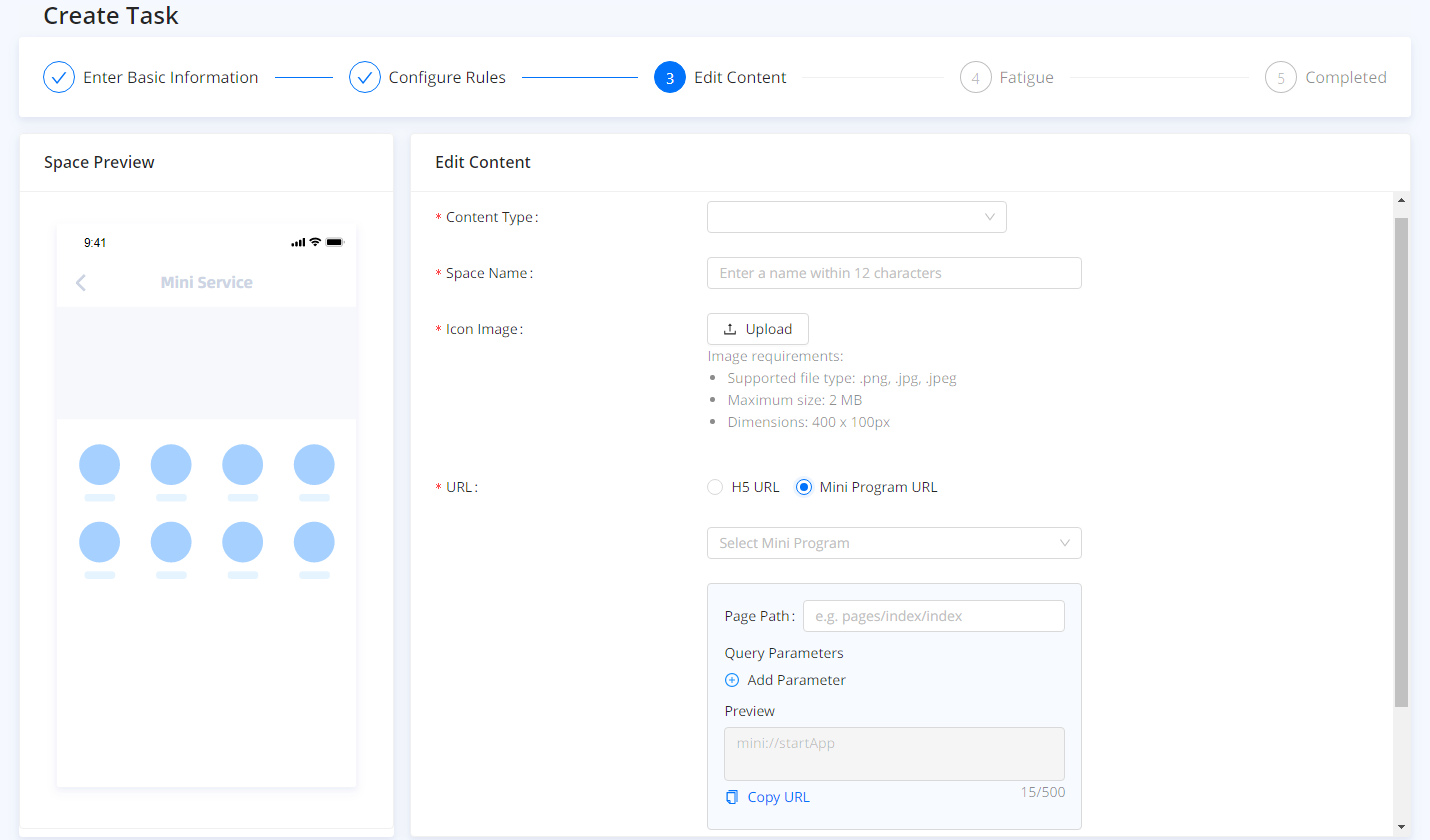
- Content Type: Select the content type for the task. Currently, a task can only display icons in the launchable.
- Space Name: Enter a name for the space within 12 characters to describe what the task is about.
- Icon Image: Upload an icon image as the ad content to show users what kind of products, services, or marketing activities you provide. You need to upload the image based on the following requirements:
- Supported file type: png, jpg, or jpeg
- Maximum size: 2MB
- Dimensions: 400 x100 pixel
- URL: Select an URL for the content. You can redirect users to an HTML5 web page or the specific content in your mini programs.
- If you want to redirect users to an HTML5 web page, click H5 URL and enter the URL in the input box below.

- If you want to redirect users to the specific content in your mini programs, click Mini Program URL. There are two different scenarios based on whether you selected a mini program during entering basic information:
- If you did not select a mini program during entering basic information, you need to select a mini program that you want to redirect users to. Then add Page Path and Query Parameters to decide the specific content of the mini program you want to redirect users to. The whole URL can be previewed and copied on the preview area.

- If you already selected a mini program during entering basic information, you add Page Path and Query Parameters to redirect users to the specific content of this mini program. The whole URL can be previewed and copied on the preview area.

Badge
If you select the Badge when creating the task, you need to specify information based on Content Type. There are two kinds of content types, including Image and Text.
- If you choose Image, you need to upload an image as the ad content to show users what kind of products, services, or marketing activities you provide. You need to upload the image based on the following requirements:
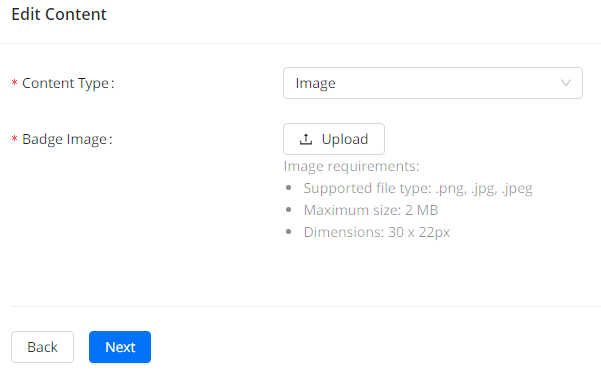
- Supported file type: png, jpg, or jpeg
- Maximum size: 2MB
- Dimensions: 30 x 22 pixel
- If you choose Text, you need to specify the following information:
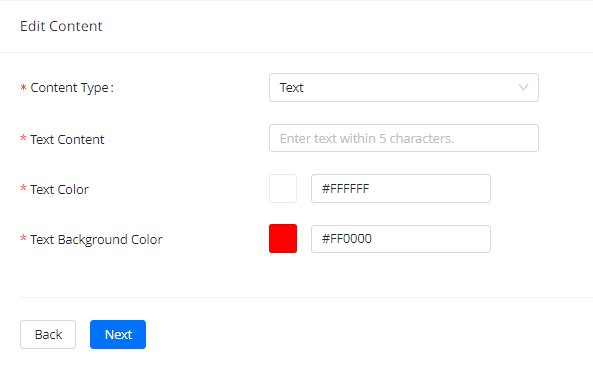
- Text Content: Enter the text that you want to attract users. It can be keywords of your marketing activities, product features, or other content to get users excited.
- Text Color: Set a color for the text to highlight the content.
- Text Background color: Set the background color for the text to build your customized ad together with the above two configurations.
Carousel
If you select the Carousel when creating the task, you need to specify the following information:
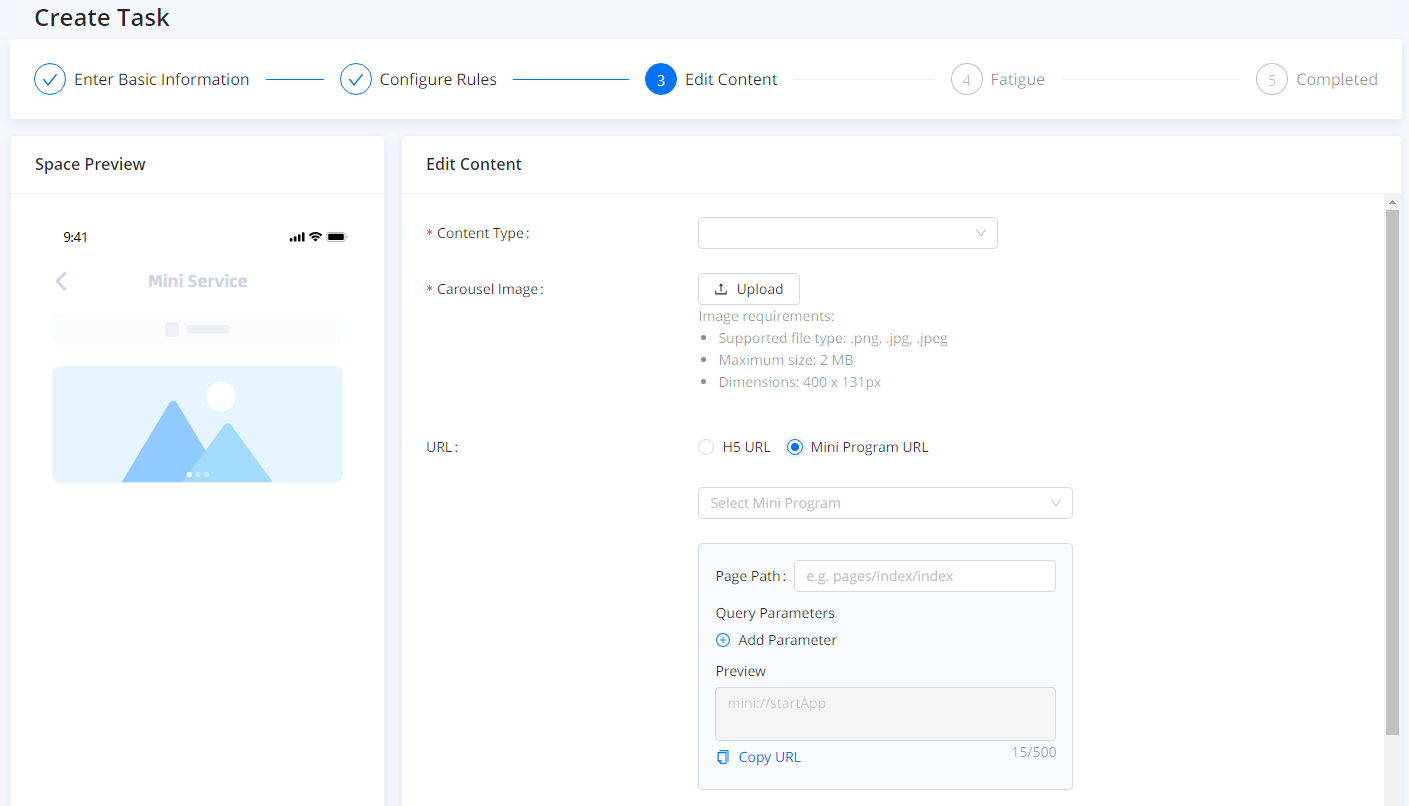
- Content Type: Select the content type for the task. Currently, you can only display images in the carousel ad space.
- Carousel Image: Upload an image as the ad content to show users what kind of products, services, or marketing activities you provide. You need to upload the image based on the following requirements:
- Supported file type: png, jpg, or jpeg
- Maximum size: 2MB
- Dimensions: 400 x131 pixel
- URL: Select an URL for the content. You can redirect users to an HTML5 web page or the specific content in your mini programs.
- If you want to redirect users to an HTML5 web page, click H5 URL and enter the URL in the input box below.

- If you want to redirect users to the specific content in your mini programs, click Mini Program URL. There are two different scenarios based on whether you selected a mini program during entering basic information:
- If you did not select a mini program during entering basic information, you need to select a mini program that you want to redirect users to. Then add Page Path and Query Parameters to decide the specific content of the mini program you want to redirect users to. The whole URL can be previewed and copied on the preview area.

- If you already selected a mini program during entering basic information, you add Page Path and Query Parameters to redirect users to the specific content of this mini program. The whole URL can be previewed and copied on the preview area.

Confirm the above information based on your selection of ad spaces and click Next.
(Optional) Set fatigue
Click + Add Item to set frequency based on clicks and display:
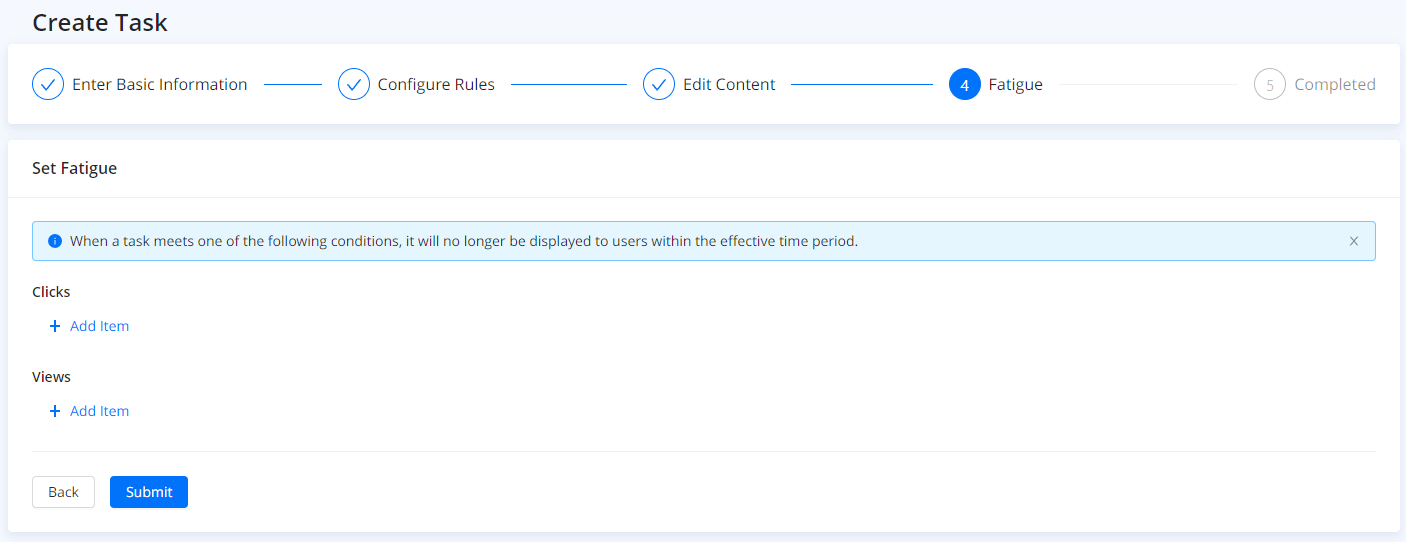
- Clicks: For example, set "Each user in every Day/Week/Month can click a task 3 times at most". Once the user has clicked the ad task 3 times a day/week/month, the user will not view the ad task in the super app.
- Views: For example, set "Each user in every Day/Week/Month can view a task 3 times at most". Once the user has viewed the ad task 3 times a day/week/month, the user will not view the ad task in the super app.
Now, you can check the task you created under Ad Management. You can also perform further operations to run the task.
