Notifications
The Mini Program Platform provides a notification feature that allows tenant workspace admins to send messages and announcements to tenant workspace members, merchants, and independent software vendors (ISVs).
This topic guides tenant workspace admins on how to publish notifications and manage existing notifications on the Mini Program Platform.
Prerequisites
- Only tenant workspace admins can publish and manage notifications.
Note: To restrict notification permissions to specific admins, contact technical support.
Publish a notification
The notification publishing process consists of the following steps:

Figure 1. Notification publishing workflow
Step 1. Create a notification
Perform the following steps to create a notification:
- Log on to the Mini Program platform as a tenant workspace admin.
- Click the
 icon in the upper-right corner of the platform.
 - On the Notifications page that appears, click Create Notification.

Figure 2. Notifications page
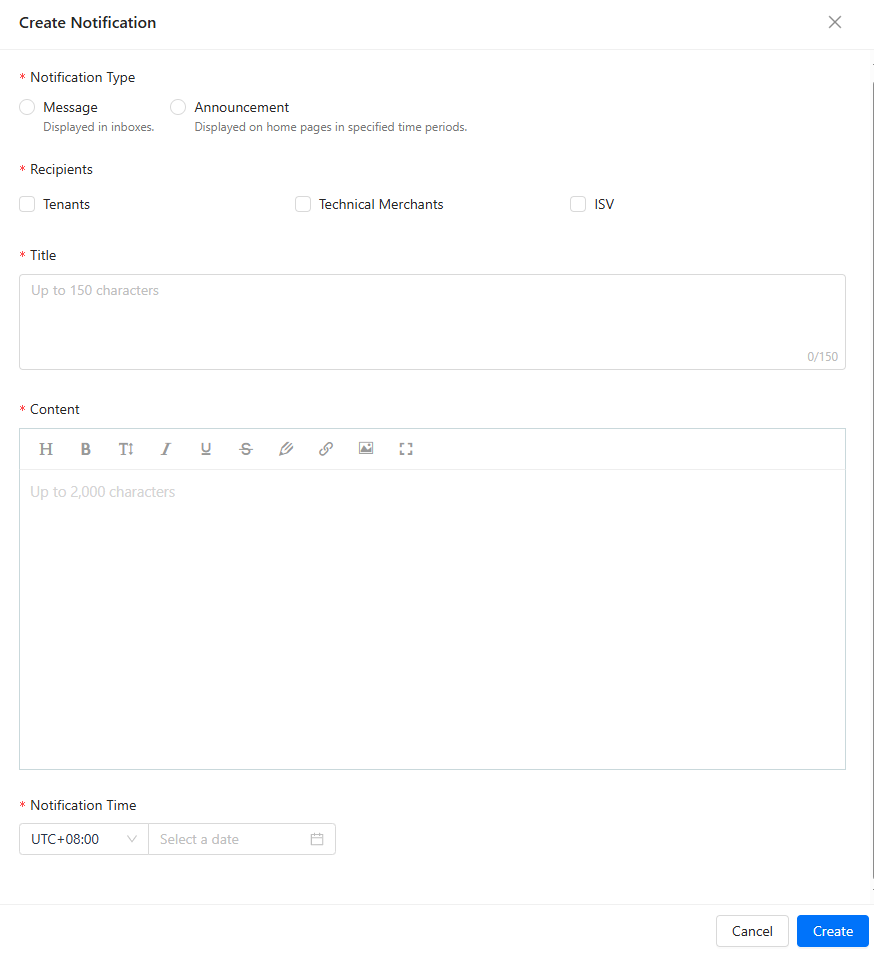
- In the Create Notification panel, configure the parameters and click Create.

Figure 3. Create Notification panel
The following items describe the parameters:
- Notification Type: Specify the notification type. Options:
- Message: Messages are displayed in the inboxes of recipients.
- Announcement: Announcements appear as notification bars at the top of recipients' workspaces during the specified time period.
- Recipients: Select one or more types of recipients of the notification. Options:
- Tenants
- Technical Merchants
- Non-technical Merchants
- ISV
Note: Available recipient options may vary by tenant.
- Title: Enter the title for the notification.
- Content: Enter the notification content. Rich text formatting is supported.
- Notification Time: Specify the time to publish the notification.
- For notifications of the Message type, specify the start time to publish the notification.
- For notifications of the Announcement type, specify the start time and end time to publish the notification.
The notification is successfully created and enters the Created state. You can find the notification in the notification list.
Step 2. Whitelist test
After the notification is created, you must submit the notification for whitelist testing before it is officially published. During the test, the notification is sent to the whitelist testers for preview.
Follow the following steps to perform the whitelist test:
- On the Notifications page, find the notification you have created.
- Click Whitelist Test in the Actions column.
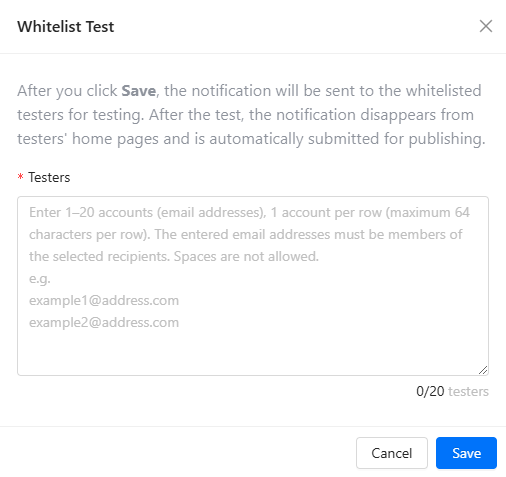
- In the Whitelist Test dialog box that appears, enter the email addresses of testers in the Testers input box and click Save.

Figure 4. Whitelist test
The notification enters the Whitelist Testing state and is sent to the specified testers. During the whitelist test, you can click Whitelist Test in the Actions column to view and modify testers. For example, you can remove an existing tester or add a new tester to the whitelist test.
- After the whitelist test, click Finish Whitelist Test in the Actions column to complete the whitelist test. In the confirmation dialog that appears, click Finish.
Note: After the whitelist test, you can still click View Whitelist to view the whitelist testers.
Step 3. Submit and publish the notification
After the whitelist test, the notification is automatically submitted and enters the Submitted state. When the specified start time is due, the notification is automatically published and enters the Published state.
- Announcement notifications will automatically stop appearing on recipients' workspaces once the specified end time is reached.
- Message notifications do not have an end time.

Figure 5. Announcement example

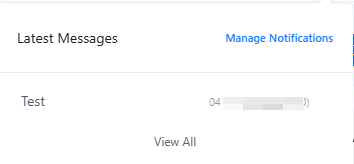
Figure 6. Message example
Modify a notification
A notification can be modified before it is submitted. Notifications cannot be modified after they are submitted or published.
To modify a notification, perform the following steps:
- Find the notification that you want to modify on the Notifications page.
- Click the notification title in the Actions column.
- In the Notification Details panel that appears, click Modify.
- In the Create Notification panel, modify the parameters based on your business requirements and click Modify.
Delete a notification
A notification can be deleted only before it is submitted. Notifications cannot be deleted after they are submitted or published.
To delete a notification, perform the following steps:
- Find the notification that you want to delete on the Notifications page.
- Click Delete in the Actions column.
- In the confirmation dialog that appears, click Delete.
Withdraw a notification
After a notification is submitted or published, you can withdraw the notification if you no longer want to publish the notification.
Take the following steps to withdraw a submitted or published notification:
- Find the notification that you want to withdraw on the Notifications page.
- Click Withdraw in the Actions column.
- In the confirmation dialog that appears, click Withdraw.
Clone a notification
After a notification is created, you can clone the notification to create another notification with the same settings.
Take the following steps to clone a notification:
- Find the notification that you want to clone on the Notifications page.
- Click Clone in the Actions column.
- The Create Notification panel appears. The parameters are autopopulated based on the existing notification. You can modify the parameters based on your business requirements.
- Click Create. The notification is successfully cloned.
