

Create features
Features serve as an authorization mechanism that controls access to specific JSAPIs. To use a JSAPI, you must first bind it to a feature.
This topic describes how to create features in the Mini Program platform.
Prerequisites
Before you begin, make sure that the following requirements are met:
- The JSAPIs that are used to construct your feature are created.
- The JSAPI-related capabilities are implemented and injected on the native side of the super app.
- Only workspace admins can create features.
Procedure
To create a feature, perform the following steps:
- Log in to Mini Program Platform.
- In the left navigation panel, click Features to navigate to the Features page.
- On the Features page, click + Add Feature.
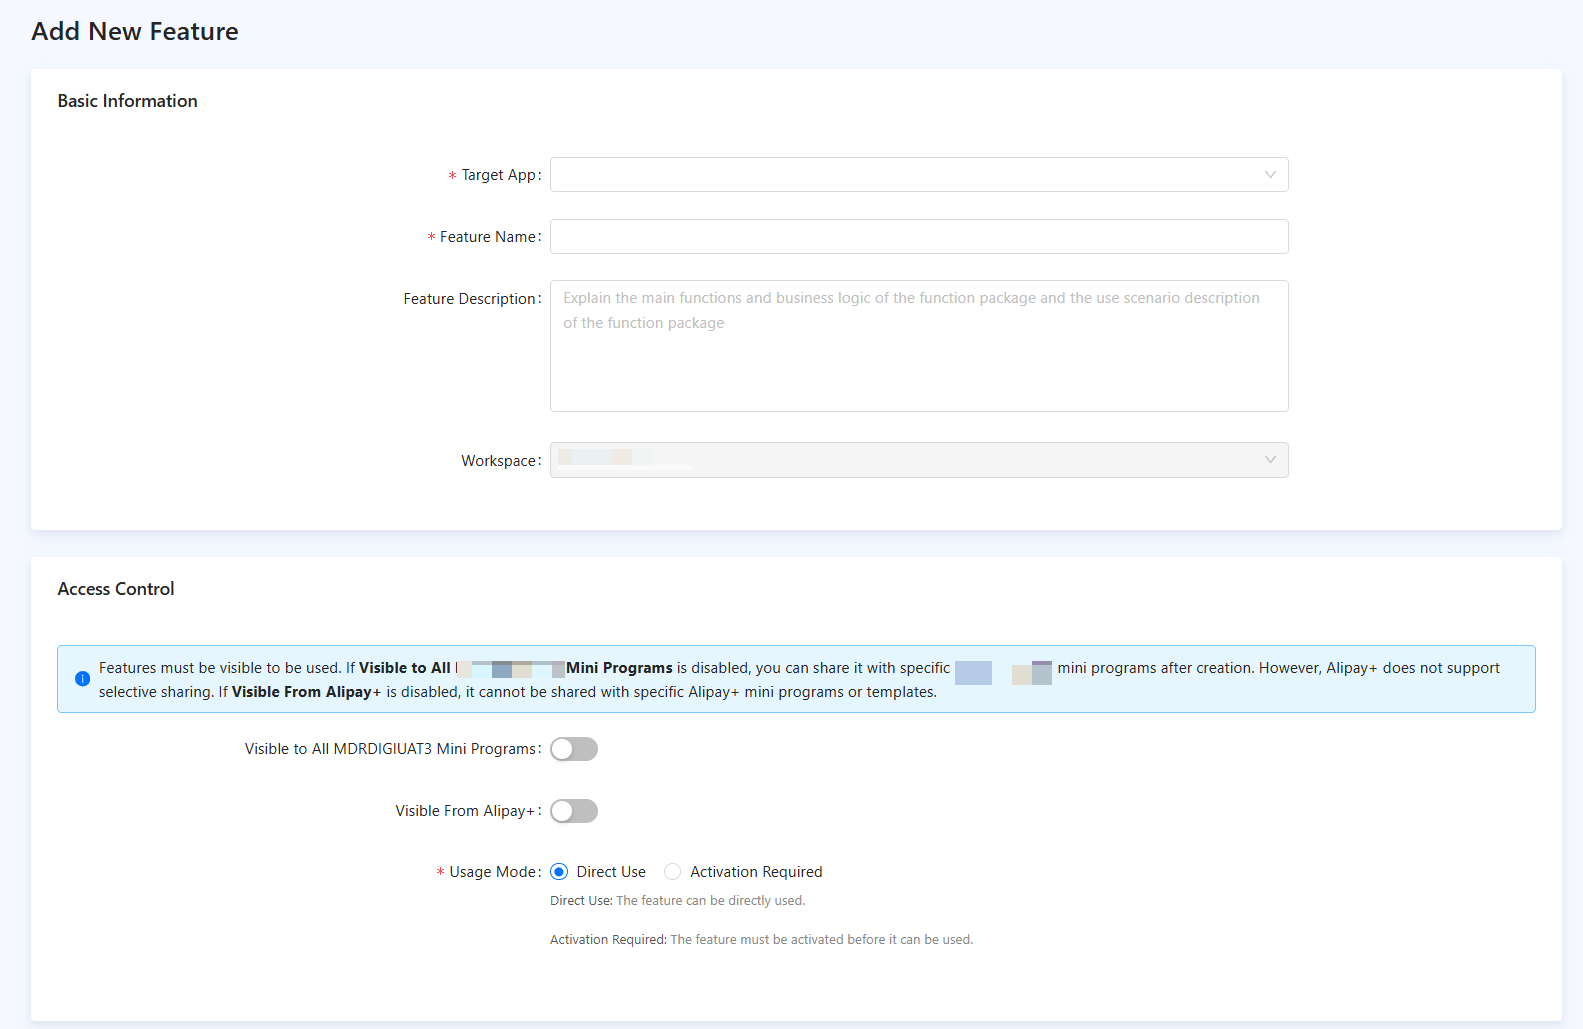
Figure 1. Create a feature
- On the Add New Feature page, specify the following information:
- Basic Information:
- Target App: Select the target app in which the feature can be used.
- Feature Name: Enter the name of the feature.
- Feature Description: Enter the description of the feature.
- Workspace: Specify the workspace to which the feature belongs.
- Access Control:
- Visible to All ${WorkspaceName} Mini Programs: Specify whether the feature can be viewed by all mini programs of the tenant workspace.
- On: All mini programs in the workspace can view this feature.
- Off: Only mini programs with which the feature is shared can view this feature. For more information, see Share features.
- Visible From Alipay+: Specify whether the feature can be viewed by mini programs and mini program templates from Alipay+. This parameter is only available for target apps that support mini programs and mini program templates from Alipay+.
- Usage Mode: Specify whether the feature can be directly accessed by mini programs. Options:
- Direct Use: Mini programs can directly access the feature.
- Activation Required: This feature can be used by mini programs only after activation.
- Configure JSAPIs of the feature. In the JSAPI area, select JSAPIs to add to the feature in the left column. Then click
 to add the JSAPIs to the right column to add them to the feature. For more information about JSAPIs, see JSAPI reference.

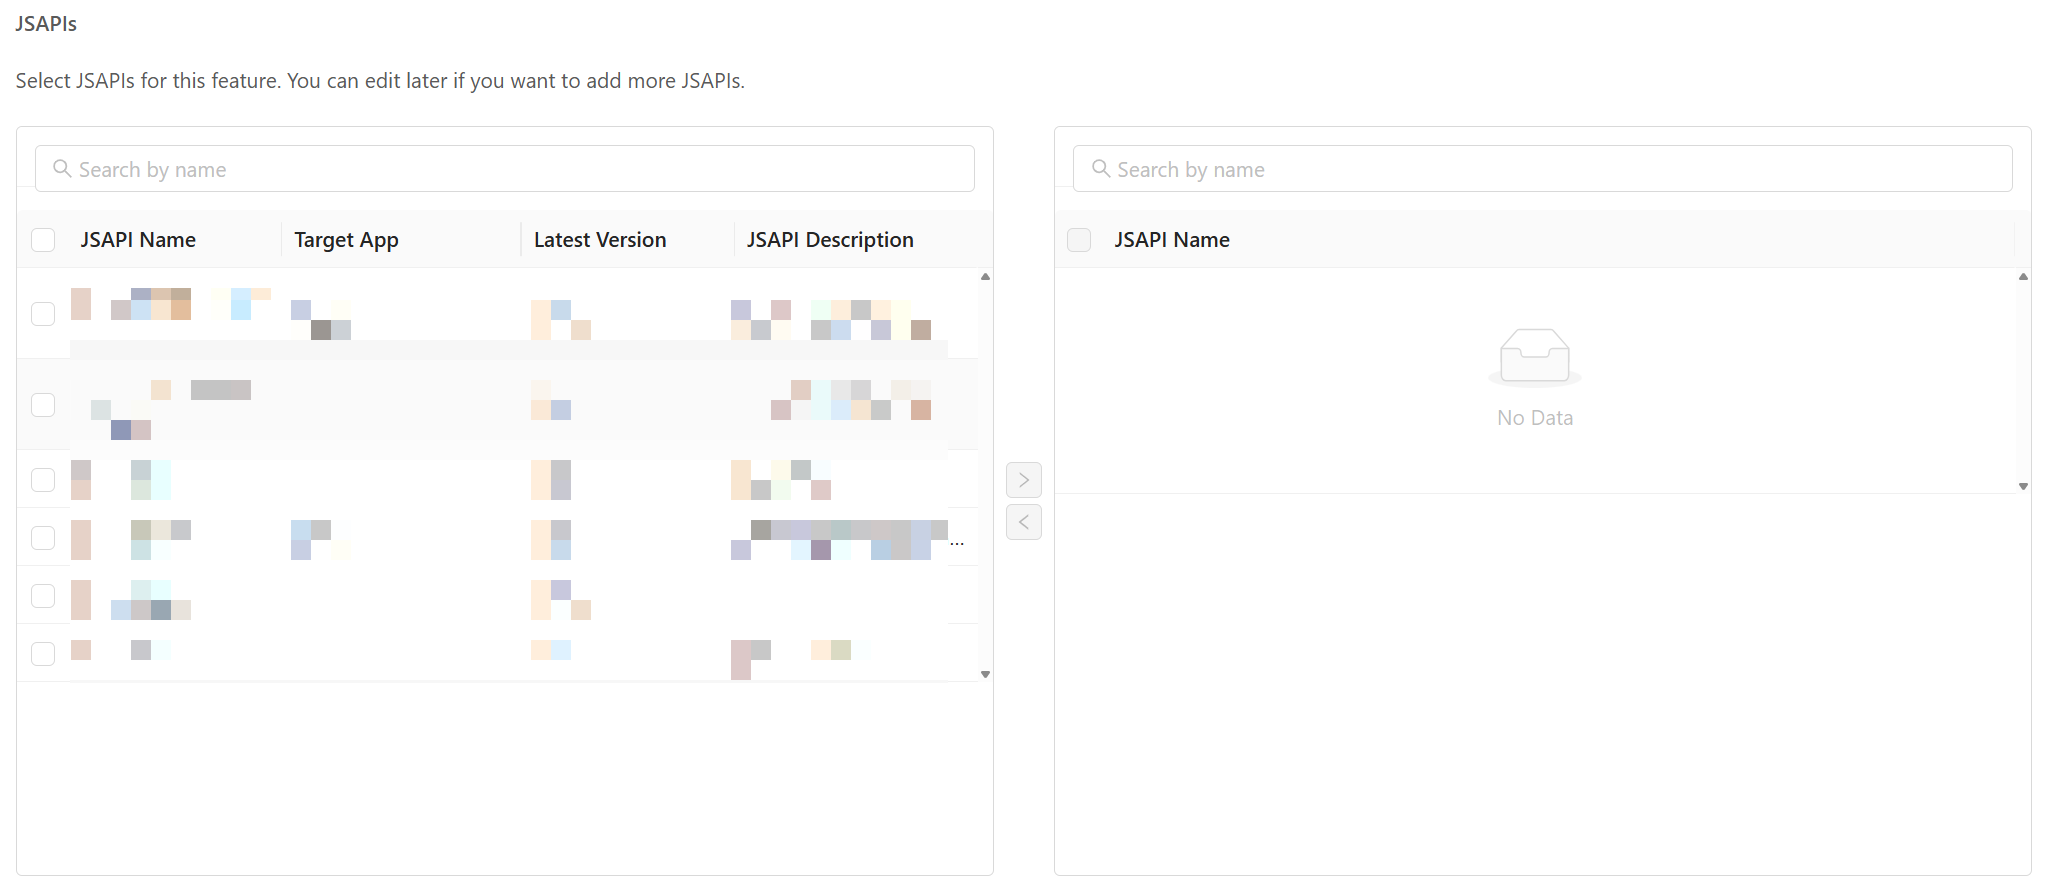
Figure 2. Configure JSAPIs
Note: After you select a target app, only JSAPIs of the selected target app are displayed in the left column. To remove a JSAPI from the feature, select it in the right column and click

- Click Confirm. The feature is successfully created. After the feature is created, developers can add the feature to mini programs. For more information, see Add features.