Configure mini program template
This topic guides you through the detailed steps to configure mini program templates. For example, configuring basic information, creating a merchant guide, configuring roles, menus, and the roles&menu visibility, and so on.
Procedures
To configure a mini program template, follow the steps below:
Step 1: Configure basic information for a mini program template
After creating a mini program template, from the left navigation bar, click Mini Program Templates > click the target template > click the Information tab, you can view the general information of the mini program template. You can also configure the basic template information per your needs, for example, adding more languages, upload the template thumbnail.
- You can add more languages to get better user experience. See the following figure. Click + to add languages one by one.
Tip: It's recommended to choose English (U.S.) for your convenience before releasing the mini program template.
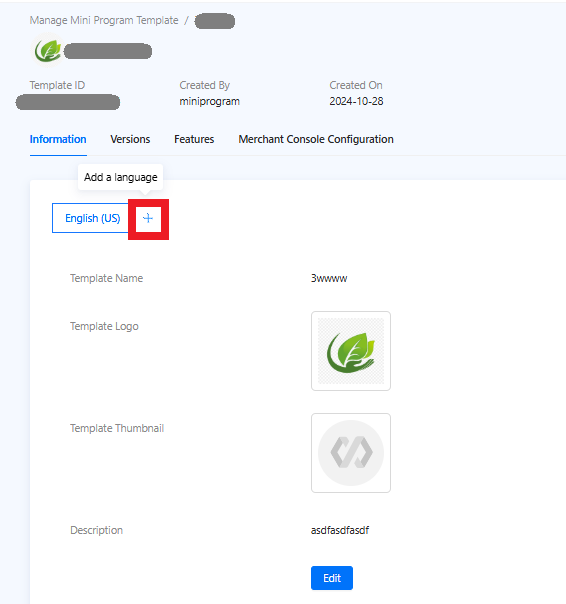
- For the added language, configure the following basic information, where the template name, template thumbnail are required.
Tip: You can upload a template thumbnail to help users identify the template that they use and better understand the businesss that the template indicates.

- After adding a language, remember to configure the roles and menus later.
- If you need to modify the basic information, click Edit under the specific language.
Step 2: Configure for the merchant console
Configure the following items to facilitate the merchant console configuration more smoothly for merchants:
Create a merchant guide
To provide better user experience, you can create a guide of task flow to instruct your users(merchants) to use the mini program template.
Notes:
- Your role must be Owner or Master.
- You must configure English as the template language before continuing this setup. For more information, see the Add a language for a mini program template topic.
Steps:
- Under the Merchant Console Configuration tab > Click Merchant Guide > Click Edit.
- Click a specific language (for example, English):
- Must enter the step title and description.
- Click Add step to add no more than 4 steps.
- (Conditional) If you want to delete a step, you must pay attention that once the step is deleted, information cannot be recovered.
- Per you multi-language demands, you must configure all information for all languages before continuing.
- Click Save to save all step configuration.
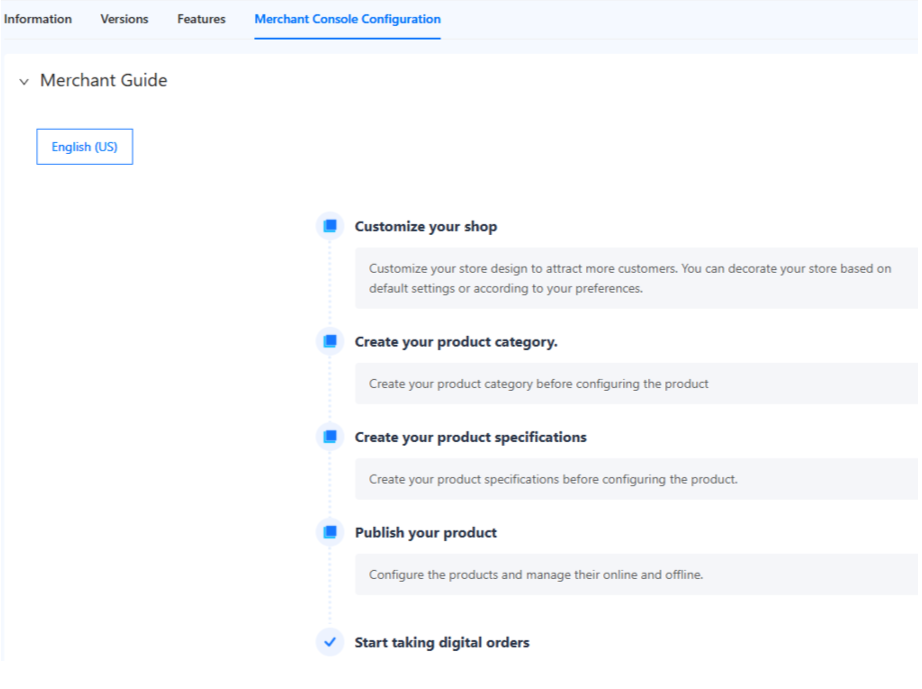
Finally, your users (merchants) can view the guide of the task flow. Take the following figure as an example.
Configure roles
Notes: Your role must be Owner or Master.
Steps:
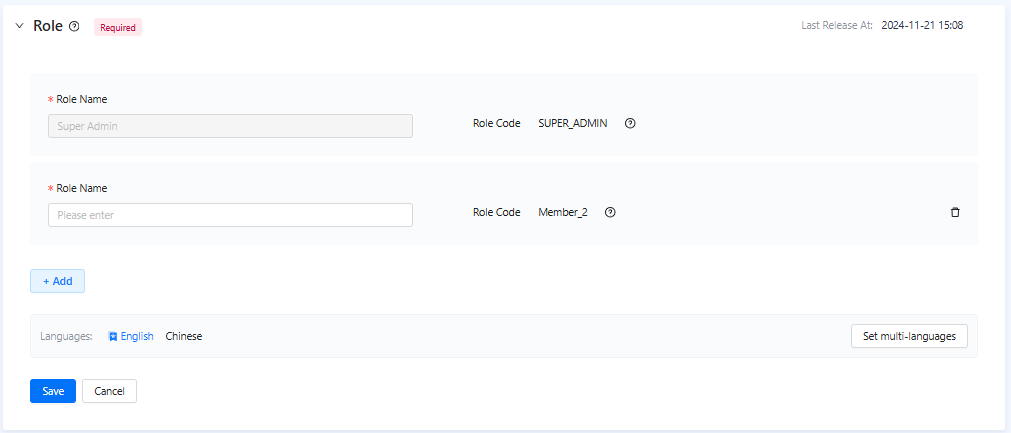
- Under the Merchant Console Configuration tab > Go to the Role section > Click Edit.

- For a specific language (for example, English):
- Must enter the Role Name. Note: Only English letters and spaces are allowed for the role name.
- The Role Code is automatically generated by the system. Please pay attention to its use in actual business scenarios.
- Click Add to add no more than 5 role names.
- Per you multi-language demands, click Set multi-languages to configure role names for all languages before continuing.
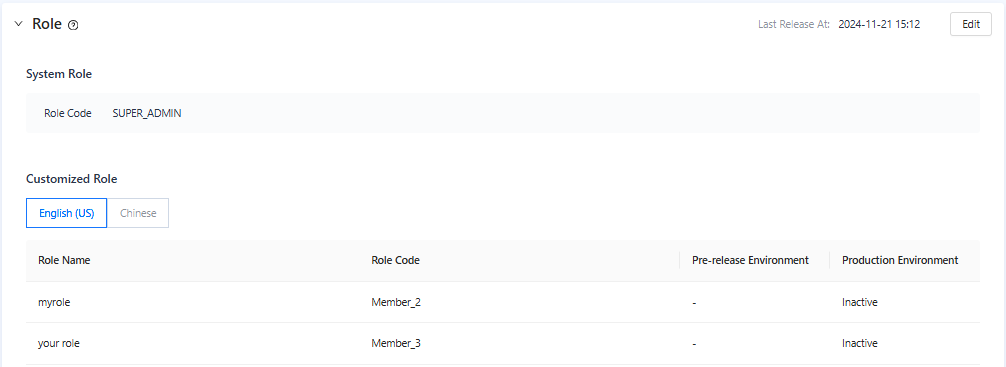
- Click Save to save all role configuration. Take the following figure as an example to view the role list, where English and Chinese are configured for the role name.

Note:
- This role configuration will take effect in both pre-release and production environments.
- The saved roles cannot be deleted.
Configure menus, and the roles&menu visibility
You need to configure menus first and then configure the roles&menu visibility.
Configure menus
Steps:
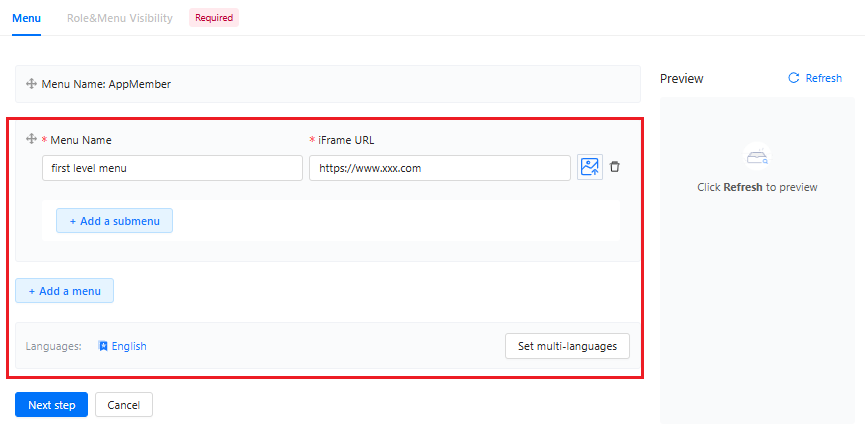
- Under the Merchant Console Configuration tab > Go to the Menu section > Click Edit.

- For a specific language (for example, English):
- Click Add a menu to add the 1st-level menu.

- Must enter the Menu Name. Note: Only English letters and spaces are allowed for the Menu name.
- Must enter the iFrame URL, which allows to include external content or other web pages to indicate the menu.
- Must choose an icon to represent the menu.
- (Optional) Click Add a submenu to add a sub-menu/the 2nd-level menu. Also Menu Name and iFrame URL are required.
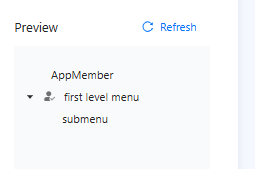
- Click Refresh in the right-top corner to preview the menu structure. Take the following figure as an example.

- Repeat the previous steps to add more menus.
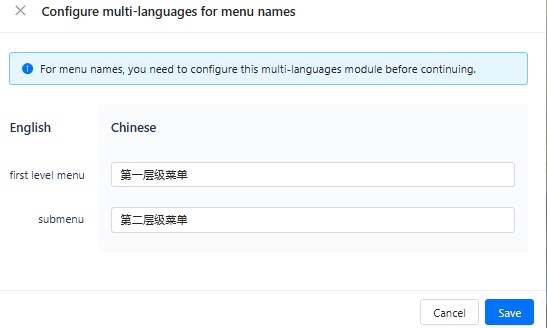
- Per you multi-language demands, click Set multi-languages to configure menu names for all languages before continuing. Take the following figure as an example.


- Click Save to save the multi-language configuration and return to the menu configuration, and then Click Next step to configure the roles&menu visibility.
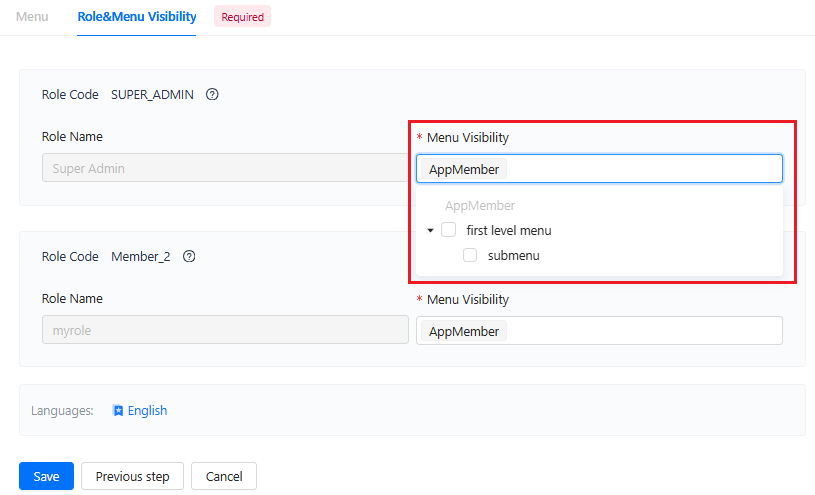
Configure roles&menu visibility
- For each role name, in the Menu Visibility list, choose the menu accordingly.
- Click Save to save all configuration.
Step 3: Manage features for a mini program template
- Click the specific mini program template to which you want to add a feature.
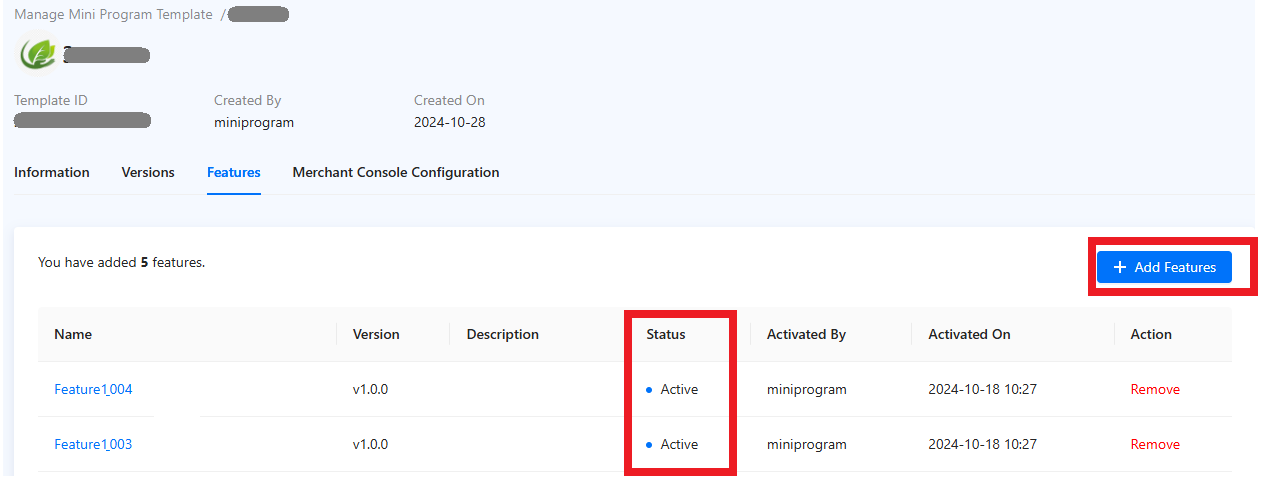
- Click the Features tab and then click + Add Feature.

- Select features properly and click Add, then the feature is shown in the feature list.
- Make sure that the feature is activated, which depends on the feature API.
After activation, your mini program template can access all the associated APIs. - If you need to remove the feature, click Remove in the Action column.
Result
With the above steps, you have now completed configuring a mini program template.
Note: You must complete the Role, the Menu, and the Role&Menu Visibility configuration before going to release the mini program template.
