Add workspace members
You can add members to a developer workspace and set the roles of the members to expand your work team and collaborate on mini program development and management.
This topic describes how to add new members to your workspace, manage invitation statuses, and assign roles to the members.
Prerequisites
- Only workspace admins can add members to the workspace and assign roles.
Add a member to a workspace
To add members to a workspace, take the following steps:
Step 1: Navigate to Members page
- Log on to the Mini Program platform.
- After accessing the workspace, click
 in the lower-left corner to navigate to the Members page.
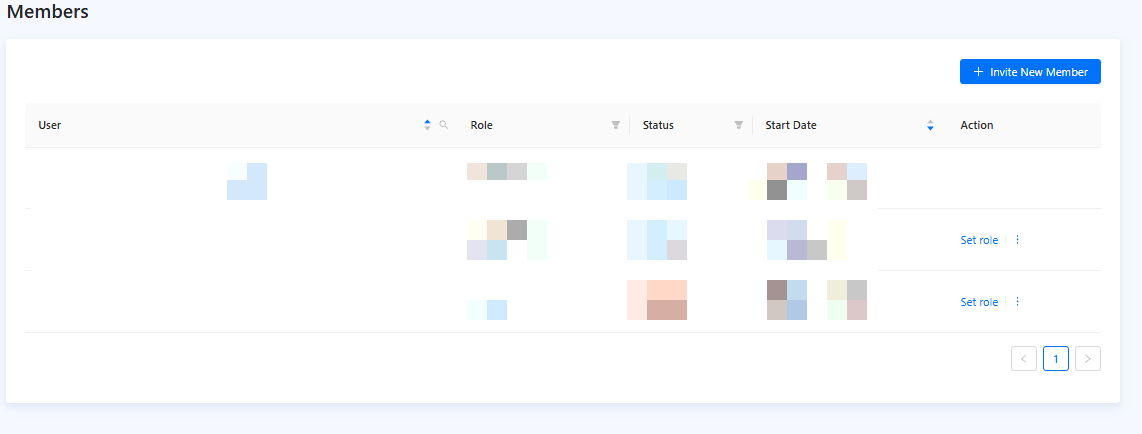
 - On the Members page, you can see the list of all members in the workspace.
- Click Invite New Member.

Figure 1. Members
Step 2: Invite a member
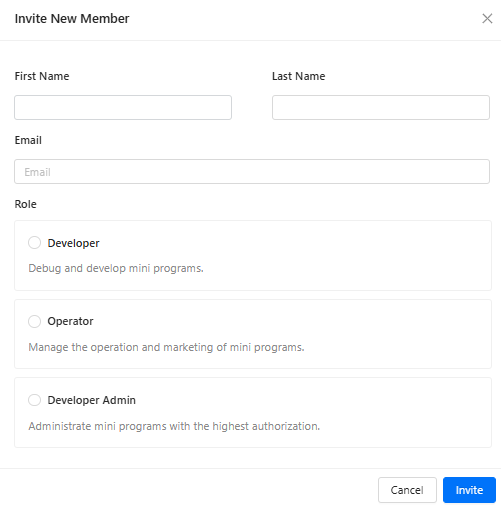
In the Invite New Member dialog, fill in the member's name and email and then set the role for the member. The email address will be used as the logging account for the member. To learn more about workspace member roles, refer to Workspace member roles.

Figure 2. Invite new member
Note: If you select Developer or Operator, you must select one or more mini programs to assign to the member. You can also assign the member to a mini program on the Members tab of the mini program after the member is added to the workspace. For more information, see (Optional) Add mini program members.
After the member receives the email and accepts the invitation, the member is added to the workspace with the assigned role.
Step 3: Manage invitation
A member invitation is valid for 3 days after you send it to the member. During this period, you can withdraw the invitation before the member accepts it. Once withdrawn, you need to go through the previous steps again to add a member to the platform. If the invitation is expired, you can click Resend to send the invitation to the member again.

